PLEXTALK RECORDING SOFTWARE USER MANUAL
Table of Contents
1 About
this Manual
1.1 Legal and Copyright Information
1.2 Information about navigating the manual
1.3 Sample exercises
2 Software Features and Limitations
2.1 Features of the Plextalk Recording Software (PRS)
2.2 Limitations of the PRS Software
3 Introduction to DAISY
3.1 What is DAISY?
3.2 Main features of DAISY
3.3 Types of DAISY book
3.4 Navigating a DAISY book
3.5 Main elements of a DAISY book
3.6 Main processes involved in producing an audio DAISY book
4 Getting Started
4.1 Terminology used in the software
4.2 Recommended system requirements
4.3 Installation and uninstallation of PRS
4.4 Launching and Exiting PRS
5 Accessing the PRS software
5.1 Description of the main screen interface
5.2 Operation from the keyboard
5.3 Information about using speech with PRS
6 Configuring PRS
6.1 Customising the Voice Guidance feature
6.2 Customising the display settings
6.3 Setting the default folder for recordings
6.4 Selecting the default CD writer
6.5 Exercises for configuring PRS
7 Opening and Creating New Projects
7.1 Opening an existing projects
7.2 Creating a new project
7.3 Opening an existing book from CD
7.4 Exercises for opening projects and existing books
8 Navigating and playing projects
8.1 Navigating sections and phrases
8.2 Playing sections or phrases
8.3 Continuous play
8.4 Adjusting playback speed
8.5 Adjusting playback volume
8.6 Getting section and phrase information
8.7 Searching for heading text
8.8 Jumping to Pages
8.9 Jumping to Groups
8.10 Jumping to Marks
8.11 Jumping to Events
8.12 Exercises in playing and moving around a project
9 Recording
9.1 Checking the Volume Control options for the computer
9.2 Selecting the required input device
9.3 Confirmation of the storage information
9.4 Setting up the recording functions
9.5 Selecting the recording mode
9.6 Adjusting the recording volume
9.7 Exercises for practicing recording techniques
10 Editing
10.1 Selecting multiple sections or phrases
10.2 Standard editing commands for phrases and sections
10.3 Editing a section
10.4 Editing phrases
10.5 Undoing editing
10.6 Editing the section properties
10.7 Setting and removing page information
10.8 Setting and removing group information
10.9 Marks
10.10 Setting page, group or mark codes whilst recording
10.11 Comments
10.12 Exercises in editing a project
11 Creating and Editing the Table of Contents
11.1 ToC (Table of Contents)
11.2 CSV (Comma Separated Variables)
11.3 TXT (Text)
11.4 Running the "ToC Import" process
11.5 Exercises in working with Tables of Contents (ToC)
12 Building the book
12.1 How to run the "Build Book" process
12.2 Outline of the alterations involved in the "Build Book" process
13 Creating the CD
13.1 Configuring PRS for your CD writer
13.2 Writing the CD
13.3 Explanation of the CD writing dialogue box
14 Additional Features of PRS
14.1 DAISY import
14.2 Audio Import
14.3 Audio Export
14.4 Text Import
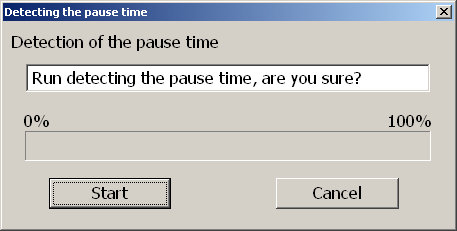
14.5 Detecting the pause time
14.6 Exercises for the additional features of PRS
APPENDICES
Appendix A - Sample Exercises
Appendix B - Menu Details
Appendix C - Short-cut Details
Appendix D - Technical Details
1 About this Manual
1.1 Legal and Copyright Information
SHINANOKENSHI reserves the right to make improvements in the products described
in this manual at any time without prior notice.
SHINANOKENSHI makes no representation or warranties with respect to the contents
hereof and specifically disclaims any implied warranties of merchantability
or fitness for any particular purpose. Further, SHINANOKENSHI Corp. reserves the
right to revise this manual and to make changes in its content without obligation
to notify any person or organization of such revision or change.
This manual is copyrighted, all rights reserved. It may not be copied, photocopied,
translated, or reduced to any electronic medium or machine-readable form without
SHINANOKENSHI's prior permission.
Manual copyright SHINANOKENSHI
Corp. edition July 2004.
MPEG Layer-3 audio compression technology licensed by Fraunhofer IIS and THOMSON
multimedia.
http://www.iis.fhg.de/

Licenses and Trademarks - All licenses and trademarks are property of their
respective owners.
1.2 Information about navigating the manual
This manual has been written in a logical sequence which should allow new
users and advanced users to easily find the information they are looking for.
New users should be able to build up their knowledge gradually by working methodically
through the chapters whilst advanced users may wish to skip some chapters or
sections and go directly to information about the more complex features.
The manual has been written in HTML format to allow you to view it in your
web browser. You can navigate through the text from start to finish or you
can use the links and headings to find particular items of interest.
The main heading and all chapter headings are at level 1, sections are at
level 2 and sub sections are at level 3. All items in the Contents list are
linked to the related part of the manual with hyperlinks. At the end of every
chapter, there is a link back to the Contents list.
1.3 Sample exercises
Throughout the manual,
reference is made to sample exercises available in Appendix
A. A copy of
these exercises and some sample projects
are available
on the "PTR1/PTR2 User's Guide" CD(\PRS\Sample Projects), provided
with your software. The sample projects should be used in conjunction with
the exercises.
Return to Chapter 1 of ToC
Return to ToC
2 Software Features and Limitations
This chapter details some
of the main features of the PRS software and some of the physical limitations
which apply when used with different
operating
systems.
2.1 Features of the Plextalk Recording
Software (PRS)
The PRS software is a
DAISY2.02 production tool which can import DAISY2.0 content for editing
or upgrading.
Please note that PRS can only produce DAISY books that are structured audio
and it does not have the capability of producing full text DAISY books.
The main features of this version of the software are as follows:
- It enables a blind or partially sighted person to create a DAISY audio book
independently.
- All menus and navigation
are fully accessible from the keyboard.
- Built-in voice guidance
and display options allow you to customise the software for your particular
needs.
- Recordings can be edited
easily using word processing style commands.
- Use of MP3 encoding
gives up to 90 hours of audio recording on a single CD.
- Built-in CD writing
facilities - you don't need a separate software for this purpose.
- Capable of creating
multiple book CDs.
- Import and edit existing
DAISY books or combine several books into one.
- Text import feature
to allow rapid conversion of text to an audio format using synthesized
speech.
- Table of Contents (ToC)
import feature to speed up the production process.
- Audio conversion facility
to change the audio format of your projects.
2.2 Limitations of the PRS Software
Depending on which operating system you are using, the PRS software is
limited as follows:
2.2.1 Limitations when using Windows
2000 or XP
- Maximum number of sections - 99,999
- Maximum number of phrases in a section - 99,999
- Maximum number of specified pages - 999,999 (see Note 1 below)
- Maximum size of an audio file (MP3 or WAV) - 2 GB
- Maximum character length
- 127 characters (see Note 2 below)
2.2.2 Limitations when using Windows
ME or 98 SE
- Maximum number of sections - 2000 (see Note 3 below)
- Maximum number of phrases in a section - 2000 (see Note 3 below)
- Maximum number of specified pages - 999,999 (see Note 1 below)
- Maximum size of an audio file (MP3 or WAV) - 2 GB
- Maximum character length
- 127 characters (see Note 2 below)
Note 1: Although you can specify up to 999,999 pages, you cannot specify Page
0 (zero)
Note 2: The character length referred to here is the text in the section property
and book information dialogue boxes.
Note 3: When using Windows ME/98 SE, there is a practical limitation of 2000
sections/phrases because of the time taken to refresh the list view. If editing
an extremely large book, it is highly recommended that you use Windows 2000
or Windows XP.
Return to Chapter
2 of ToC
Return to ToC
3 Introduction to DAISY
This chapter gives an overview of the DAISY format and some of the terminology
used. It also gives information about the structure of a DAISY project and
the processes involved in producing a DAISY book. If you are a new DAISY user,
you should read this chapter thoroughly. If you are an experienced DAISY user,
you may wish to skim read the chapter or bypass it altogether.
3.1 What is DAISY?
DAISY is an acronym which stands for Digital Accessible Information SYstem.
It is the information format which is being developed as the international
standard for digital talking books. DAISY books can be played on a dedicated
hardware player or on a computer equipped with the appropriate software.
3.2 Main features of DAISY
The main features of the DAISY format are as follows:
Compression of information - with high levels of compression available, it
is possible to store up to 90 hours of digital audio on a single CD. Imagine
storing a similar amount of audio on cassette tapes!
Speed of Navigation - the DAISY format includes a range of features which enable
the reader to quickly access parts of the book. These features include 6 levels
of navigation, coding of pages and groups and the ability to move backwards
or forwards a phrase at a time. These items will be discussed in more detail
later in this chapter.
Multi-media capability - in addition to digital audio, the DAISY format is
able to incorporate text, graphics and even video to provide the reader with
a fully synchronized reading experience.
3.3 Types of DAISY book
The DAISY format allows for 6 types of DAISY book which range from audio books
with no navigation structure to books with text and no audio. A brief description
of each type is given below:
- Type 1 - Audio without
structure: The simplest type of book. Direct navigation to points within
the book is not possible.
- Type 2 - Audio and structure
only: A marked up text file contains the structure of the book and provides
links to features such as headings and page numbers.
This allows the end user to navigate directly to those points. The marked
up file is called the Table of Contents or ToC.
- Type 3 - Audio with
structure and partial text: As well as containing the structure, the
marked up file contains some text from the book, for example,
for a glossary or index. If listening to the book on a pc the text will
appear on screen and the user will be able to search for words within the
text.
- Type 4 - Audio and full
text: This is the most time consuming type of book to produce but provides
the most access. Audio and text are fully synchronised
throughout the book, so that the correct text appears on screen as the
audio is being read.
- Type 5 - Full text and
partial audio: the book has structure and complete text but only limited
audio. The marked up file contains the structure and
the text of the book, but there is only audio for part of the text. The
end user can navigate through the text.
- Type 6 - Full text and
no audio: This is electronic text with structure, there are no audio files.
Note: As the PRS package is designed to produce structured audio only
talking books, it has no facilities for including text, graphics or video.
For this reason, this manual only deals with the production of Type
2 DAISY
books (structured audio).
3.4 Navigating a DAISY book
A DAISY book can have up to 6 levels of navigation. The number of levels in
a book will depend on the structure of the original book. The levels are hierarchical
with Level 1 the highest level of navigation and Level 6 the lowest.
There are no fixed rules about how the DAISY navigation levels should be used
and people's views on how this should be done will vary. For simple books which
only have chapters, it is likely that only one level (Level 1 equating to chapters)
will be used. For more complex books, which may have chapters, sections and
sub sections, there might be 3 levels used (Level 1 for chapters, Level 2 for
sections and Level 3 for sub sections). Once the book has been created, the
levels of navigation are fixed and cannot be altered by the reader.
When trying to find a specific part of a book, the reader would tend to use
a higher level (perhaps Level 1 or Level 2) to find the main area of interest,
and would then change to a lower level of navigation to home in more on the
information they are looking for. This allows them to bypass large portions
of the book that they have no interest in at that time.
DAISY books can allow the reader can go directly to specific pages. To make
this possible, the producer of the book must include the page codes at the
correct locations when they create the book. Pages cannot be coded by the reader.
Two other DAISY navigation
features, namely "Groups" and "Phrases" are
available to the producer of the DAISY project. Both of these features give
the reader extra navigation options and are explained in the chapter called "Getting
Started" later in this manual.
Once the book is complete, the reader can add bookmarks at relevant places
to enable them to find the marked locations at a later stage. The number of
permitted bookmarks will depend on the player used but generally there will
be more capacity than the reader requires. Bookmarks are the only item that
the reader can insert and remove.
3.5 Main elements of a DAISY book
A DAISY book consists of a number of items. A brief summary of these is given
below:
- Audio files - these are
the main building blocks of any audio DAISY book. The DAISY format is able
to work with audio formats including
MP3 and WAV.
The selection of the audio format for a particular recording will depend on
the audio quality required and the estimated length of the recording. A DAISY
book may contain a single audio file or a large number of individual files
depending on how the recording was made. The audio files created by the PRS
software are all named in the same style. This is the letter "a" followed
by 6 numbers and with a file extension ".MP3" or ".WAV".
- Navigation files - in order
to enable the reader to quickly move around a DAISY book, the software creates
a number of navigation files
automatically.
There are 2 main types of navigation file. Firstly there are files which have
a ".HTML" or ".HTM" file extension. The most important
of these is the "NCC.HTML" or "NCC.HTM" file. In this context "NCC" stands
for "Navigation Control Centre". This NCC file contains information
about how the book is structured and how the audio files should be linked together.
The second type of navigation file can be recognised by their ".SMIL" file
extension and are generally called the "smile files". These files
control the timing of the audio playback. Without these files, the audio files
would not be 'linked' together and could only be played like tracks on a standard
music CD. All the smile files that are generated by the PRS software will
have the same style of file name. This is the three letters "ptk" followed
by 6 numbers and with a file extension of ".SMIL".
- Book information - This
is information about the original print book and about the people involved
in creating the DAISY book. This includes
the title of
the book, the name of the author, the publisher, the ISBN, the name of the
narrator(s), the name of the book producer and the language. Although it is
possible to create a DAISY book without completing this information, it is
good practice to aim to fill in as much information as possible. The information
provided will be used as "meta data" in the NCC file along with the
Table of Contents information. Meta data is just the name given to this kind
of information in the marked up file.
- Table of Contents
or ToC - this is information which is stored in a marked
up text file which controls the outline structure of the DAISY book. It acts
as a link between the audio files and the navigation files.
3.6 Main processes involved in producing an audio DAISY book
When producing an audio DAISY book, there are a number of tasks to complete.
In outline, these are as follows:
4 Getting Started
By now, you should have a reasonable overview about the way a DAISY book is
structured and produced. This chapter focuses on how you get started with using
the PRS software.
4.1 Terminology used in the software
In order to avoid any confusion with terminology, the most commonly used terms
used in the PRS software are explained below. It is stressed that the way
these terms are defined relates to their use in the PRS software and may
not be used in the same context in other publications.
4.1.1 Project
A project is a DAISY
book before it is finished. The final process of building the book is the
point at which the project is complete. At this stage it would be called
a DAISY book.
4.1.2 Book
A "book" is a
finished project. At this stage it is ready for distribution. If further
editing of
the book were required subsequently, the book would have
to be imported into the PRS software as a new project.
4.1.3 Title
Throughout this manual
the term "title" refers to the title of a book.
4.1.4 Section
A "section" in the PRS
software refers to the segment of audio between one heading and the next.
A section is generally made up of a number
of phrases but can have as few as one phrase. Each section will have a heading
and a heading level associated with it. Do not get confused between sections
in the PRS software and sections of this manual!
4.1.5 Heading
A "heading" is the text
associated with a section. The default text for all section headings is the
word "Heading". A more descriptive
heading can be entered by the producer of the project. The heading text forms
the basis of the Table of Contents and is used in the NCC file.
4.1.6 Level
The "level" of a section
refers to its DAISY navigation level. As mentioned earlier in the manual,
the producer of the DAISY book can choose
from 6 levels of navigation. These are known as Level 1, Level 2, Level 3
and so on. Level 1 is the highest level of navigation and Level 6 the lowest.
Every
section in a DAISY project/book has an associated level of navigation. The
default level for all sections is Level 1. The level can be altered by the
producer of the project but cannot be altered by the reader.
4.1.7 Phrase
When the book is being recorded,
the audio files are automatically divided into segments called "phrases".
The recording software will decide on where a phrase starts and ends based
on the amount of silence between
one piece of audio and the next. The length of silence permitted before
a new phrase is created is called the "pause time" and can be adjusted
by the person making the DAISY recording. In order to break the audio up
into phrases that are not too long or short, a fast reader might require
a short pause time and a slower reader a longer pause time. When the recording
is finished, the reader can use the phrases as an additional navigation
feature.
4.1.8 Page
A "Page" refers to a code
placed into the DAISY project. The page code is attached to a phrase and
can be inserted or removed by the project
producer before it is completed. It should be noted that page coding in the
final DAISY book may not match the pages in the original printed text book
depending on the needs of the project. For example, page numbering in the
DAISY book may start at the point where the printed book content starts,
ignoring
the page numbering of items such as the preface, dedication and extraneous
information.
4.1.9 Group
The "group" coding is
a flexible navigation feature and can be used by the project producer to
relate to elements in the book that they wish to
reference separately from the other navigation features. For example, the
producer may choose to use the group code to identify each paragraph, though
this would
be very labour intensive. It might also be used to reference other items
such as points of note, warnings, diagrams or tables. As with most DAISY
elements,
the group coding is decided upon by the producer and cannot be altered by
the reader.
4.1.10 Mark
A mark is a way in which
the producer of the project can identify particular phrases in the project
that may need
further attention. Marks do not affect
the playback of the finished book but would normally be removed by
the producer before finalising the project.
4.1.11 Event
An event includes all of the following:
the first phrase in every section; phrases coded with the "Page" code
and phrases coded with the "Group" code.
Phrases marked with the "Mark" code are not considered to be "events".
4.2 Recommended system requirements
SHINANOKENSHI recommends the following system environment for running the PRS
software. SHINANOKENSHI does not guarantee proper operation of the software on systems
which do not meet this specification.
Recommended Specification:
- Computer: PC/AT compatible machine
- Operating System:
XP (Home/Professional), Windows
2000, ME or 98 SE
- Processor (CPU): Intel Celeron 400 MHz or higher
- Memory: 128 MB or higher
- Screen Resolution: 800 by 600 pixels or higher
- Hard Disk (HDD): 1 GB for software installation (including temporary image
file area for CD writing) and 2 GB or more of free disk space for recorded
content
- Sound card
- CDR/CDRW Drive: A list
of recommended drives is given at Appendix D, Table
D1
- Voice Guidance: To comply
with Microsoft Speech API 4.0 as following TTS engine. (Included this software)
Mary, Mike, Sam, Mary (for Telephone), Mike (for Telephone), Female Whisper,
Mary in Space, Mary in Hall, Mary in Stadium, RoboSoft Six, RoboSoft Five,
RoboSoft Four, Male Whisper, RoboSoft One, RoboSoft Two, RoboSoft Three,
Mike in Hall, Mike in Stadium, Mike in Space.
4.3 Installation and uninstallation of PRS
This section of the manual explains how to install and uninstall the PRS
software.
Note: The file name for set-up or the version number appearing
on the screen will be different from the one written on the manual after
the upgrade has been done.
4.3.1 Installing PRS
To install the PRS software do the following:
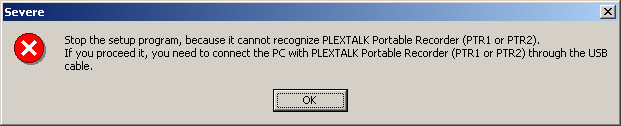
- Connect the Plextalk
PTR1/PTR2 recorder to your computer and ensure that the device is recognised
by your system. This is required because the software will not
install without first recognising the PTR1/PTR2 drive. You should refer
to the PTR1/PTR2 User Guide for detailed instructions of how to connect
the PTR1/PTR2
to your computer
for the first time.
- Insert the PTR1/PTR2
User Guide CD into the PTR1/PTR2.
- From the Windows Start
Menu, select the "Run" option. Once in the "Run" dialogue
box, select the "Browse" button and navigate to the "PRS" folder
on the CD. Locate and highlight the file called "PRSsetup2_XX_XX_XXE.exe" and
press the "Enter" key. This will return you to the "Run" dialogue
box with the correct filename entered in the command line. Press
the "Enter" key
once more and the installation wizard will start.
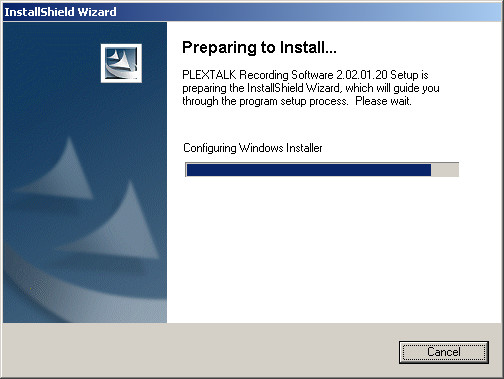
- If the computer is unable
to recognise the CD, an error message will be displayed at this stage.
Check that the PTR1/PTR2 is correctly connected
and installed before
re-trying.
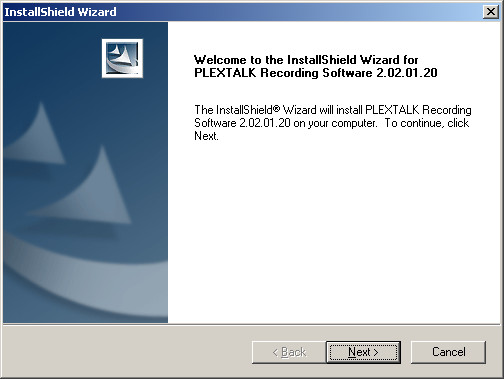
- If the PTR1/PTR2 is
correctly recognised, the "Welcome" dialogue box will
appear. Press the "Next" button to continue.
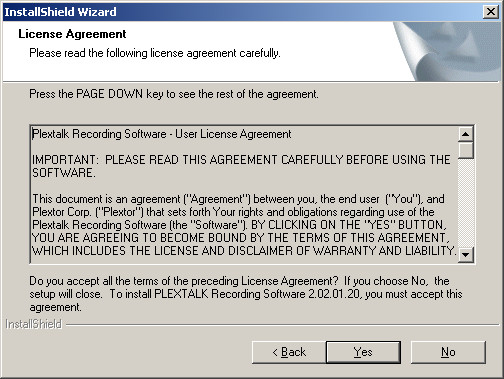
- The "Licence Agreement" dialogue
box will appear. In order to continue with the installation, you should
read the agreement and then press the "Yes" button.
If you do not accept the terms of the agreement, press the "No" button
and the installation will abort.
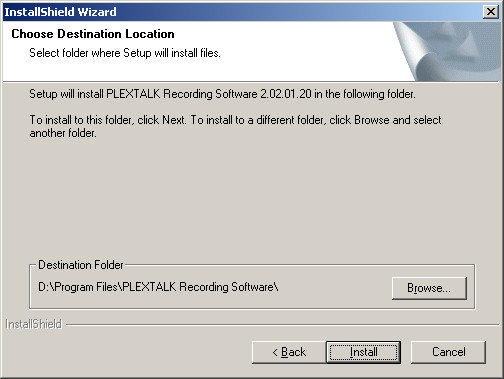
- If you accept the agreement,
the "Choose Destination Location" dialogue
box will appear. You may choose to accept the default installation
location or enter an alternative folder name in the edit field provided.
Once you have
made your choice, press the "Install" button and
the installation process will start.
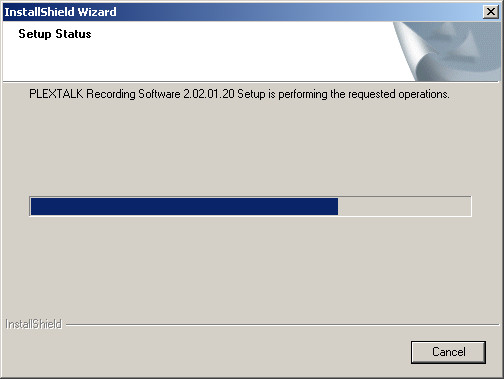
- When the installation
process is complete, the "Install Shield Wizard
Complete" dialogue box will appear. Press the "Finish" button
and re-start your computer.
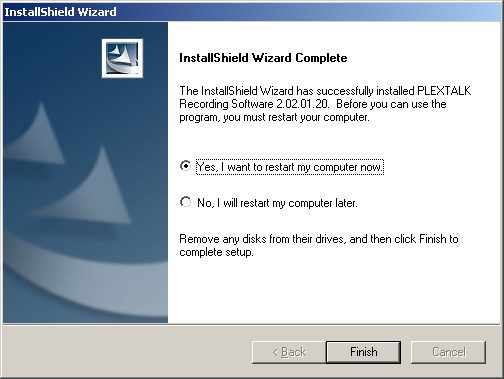
- Installation of the
PRS software should now be complete.
4.3.2 Uninstalling PRS
To uninstall the PRS software do the following:
- From the Windows Start
Menu, select the "Settings" menu and then
the "Control Panel" option and press the "Enter" key.
- The Windows Control
Panel will appear. From the list of items, select "Add/Remove
Programs".
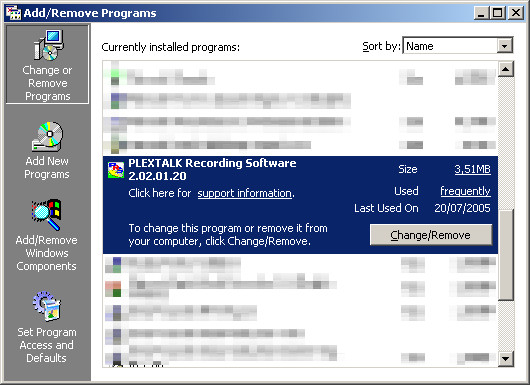
- The "Add/Remove
Programs" dialogue box will appear. From the list
of installed components, select "Plextalk Recording Software" and
press the "Change/Remove" button.
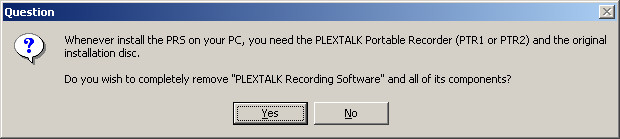
- A dialogue box containing
the following text will appear: "Whenever install
the PRS on your PC, you need the PLEXTALK Portable Recorder (PTR1
or PTR2) and the original installation disc. Do you wish to completely
remove "PLEXTALK
Recording Software" and all its components?"
- To continue uninstalling
the PRS software, press the "Yes" button.
- The uninstallation will
start.

- After a short pause,
the "Maintenance Complete" dialogue box will
appear. Press the "Finish" button to complete the process.
4.4 Launching and Exiting PRS
This section of the manual explains how to launch and exit the PRS software.
4.4.1 Launching PRS
In order to launch the PRS software, do the following:
- Select the "Plextalk
Recording Software" icon on the desktop, or,
from the Windows Start Menu, select the Programs menu then the "Plextalk
Recording Software" menu and then the "Plextalk Recording Software" short
cut. When you have selected the relevant short cut, press the "Enter" key.
- Either of these options
will launch the software.
- The first time you launch
the PRS software, the voice guidance feature will be present. Later in
this chapter you will be shown how to turn
it off or customise it according to your needs.
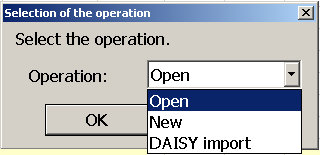
- After a short pause,
the "Selection of the Operation" dialogue box
will appear. This gives you 3 options. You can choose to open an
existing project, create a new project or import an existing DAISY book.
Use your "Up" or "Down" Arrow
keys to select the required operation and then press the "Enter" key.
Pressing the "Escape" key at this stage will launch the
software with no project loaded. The voice guidance will announce "the
project does not exist".
- If you select "Open",
you will be presented with a standard file open dialogue box, in which
you need to highlight the project folder and file
that is to be opened, and then press the "Open" button.
- If you select "New",
you need to give the software some additional information for the new project
to be set up. This is done using 3 simple dialogue
boxes which appear one after the other. Firstly you will have
to specify the audio format that you wish to use for the project. The next
box asks you to
specify a project name and folder in which it is to be saved.
Finally you will be presented with the "Book Information" dialogue
box - you can either enter the book information at this point or at any
other time before the project
is finalised.
- If you select "DAISY
Import", you will again be presented with 3
dialogue boxes. The first asks you to specify the NCC.HTML
or NCC.HTM file that is to be imported. The second allows you to specify
the audio format to
be used and the third asks you to specify the location and
project name for the imported book. Further detail about the DAISY Import
feature is given in
Section 14.1 in this manual.
4.4.2 Exiting PRS
To exit the PRS software, do the following:
5 Accessing the PRS software
This chapter gives details about the software interface, how to access it
from the keyboard and the voice guidance feature.
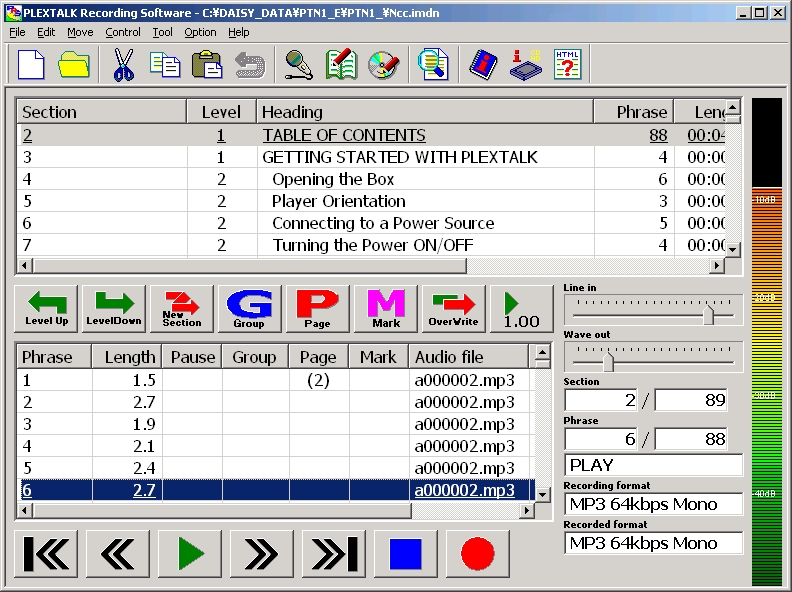
5.1 Description of the main screen interface
The main screen in the PRS software is laid out like a typical Windows
application. There is a Title Bar at the top, under which there is a Menu Bar
and a Tool Bar. The remaining screen is divided into 3 areas: the Section List,
the Phrase List and the Monitoring Display area.
The Section List is immediately under the main toolbar and stretches across
the entire width of the application window. The Phrase List and the Monitoring
Display areas are both below the Section list, with the Phrase List on the
left and the Monitoring Display on the right. Each of the main items on the
screen is described in more detail below.
5.1.1 Menu Bar
This has 7 items. From left to right,
these are: File, Edit, Move, Control, Tool, Option and Help. Keyboard navigation
of the Menu Bar and the associated
drop-down menus conforms to normal Windows standards. A full list of the
items on each drop down menu is given at Appendix B. A list of the available
short cut keystrokes is given at Appendix C.
5.1.2 Main Toolbar
This toolbar contains icons for
features that affect the project as a whole and also the Windows editing
features that you would expect to find in
most Windows applications. It consists of 13 icons immediately under
the Menu
Bar. From left to right, these are: New project, Open project, Cut, Copy,
Paste, Undo, Recording settings, Build book, CD writing, Find heading,
Book information, Storage information and HTML Help. If a mouse pointer
is positioned
over any of these icons, a text tool tip is displayed to tell you what
feature the icon represents. All of these features can be accessed
through the menus
or by keyboard short cuts as well as from the Toolbar.
5.1.3 Section List
The Section List is split into 7
columns with the following headings: Section, Level, Heading, Phrase, Length,
Page, and Comment. When the project contains
recorded material, this area will list all the sections in the project.
Relevant details for each section will be displayed in the columns
to the right of
the section number.
5.1.4 Centre Toolbar
Between the Section List
and the Phrase List, there is a toolbar which has 8 buttons. Most of the
features are for editing the properties of sections or phrases. From left
to right, they are: Level up, Level down, Section creation, Group, Page,
Mark, Recording mode toggle and Play speed. All features can be accessed
using keyboard alternatives.
5.1.5 Phrase List
The phrase List is split
into 8 columns with the following headings: Phrase, Length, Pause, Group,
Page, Mark, Audio file name and Comment. When the project contains recorded material,
this area will list all the phrases in the section which is highlighted
in the Section List. Relevant details for each phrase will be displayed
in the columns to the right of the phrase number.
5.1.6 Lower Toolbar
Under the Phrase List,
there is a third toolbar with 7 icons. This toolbar can be used to control
the playing and recording of the project. From left to right, the icons
are: First phrase, Previous phrase, Play, Next phrase, Last phrase, Stop
and Record.
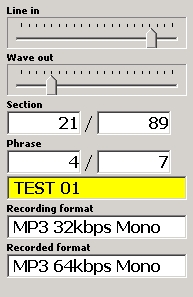
5.1.7 Monitoring Display
Level with the phrase List, at the
bottom right corner of the screen, is another box. This lists, vertically,
7 items related to the monitoring
of recording
and playing levels and the status of the project. From top to bottom, these
are: Recording level slider, Playback volume slider, Section
information window, Phrase information window, Status window, Recording
format and Recorded format.
5.2 Operation from the keyboard
All features of the PRS
software can be accessed either by keyboard commands or by using the
mouse. Most of the keyboard commands
follow the standard Windows
pattern, for example, Cut, Copy and Paste use the keystrokes "Control+X", "Control+C" and "Control+V" respectively.
This section details some of the most useful keyboard commands. A comprehensive
list of keyboard commands is provided at Appendix B & Appendix
C.
5.2.1 Tab key
On the main screen, this key will
switch the focus from the Section List to the Phrase List and vice versa.
If the voice guidance is on, you
will hear "Section" or "Phrase" to
tell you which list the focus has moved to. Within dialogue boxes, "Tab" or "Shift+Tab" will
move you forward or backwards around the dialogue box.
5.2.2 Arrow keys
Within the Section List or the Phrase
List, the Arrow keys will move you up or down on the list of sections or
phrases. In lists that are in
dialogue
boxes, they will allow you to change a selection.
5.2.3 F12 or F9 keys
These 2 keys have identical meanings
in the PRS software and which one you use is a matter of personal preference.
The usage of the keys depends
on the situation as follows:
- If the focus is on the
Section List, pressing "F12" or "F9" will
cause the voice guidance to speak the section information for the section selected.
- If the focus is on
the Phrase List, pressing "F12" or "F9" will
cause the voice guidance to speak the phrase information for the phrase
selected.
- If the focus is in a dialogue box, pressing "F12" or "F9" will
cause the voice guidance to speak the item you are highlighting.
- When the PRS software is processing a command such as a DAISY Import
or Audio Export, pressing "F12" or "F9" will indicate the
percentage of the operation that has been completed.
- Note: The F12 and F9
keys will only have the above effects if the Voice Guidance feature is
turned on.
5.2.4 Shift+F1 key
Pressing this key combination when
the focus is on the Section List or Phrase List will cause the voice guidance
to speak the following items:
Input volume
(from microphone or other input device), Wave out volume, Section selected,
Total number of sections, Phrase selected, Total number of phrases, the
Recording format and the Recorded format.
5.2.5 Alt key
This has the standard Windows usage
and, when pressed, will take the PC focus to the Menu Bar. If pressed whilst
you are on the Menu Bar or
in a drop down
menu, it will close all drop down menus and return the focus to the Section
List or Phrase List.
5.2.6 Control key
This can be used to mute the voice
guidance at any time.
5.3 Information about using speech with PRS
The PRS is supplied with a built-in Voice Guidance facility. The text
to speech engine used conforms to Microsoft's speech API 4.0. With the speech
enabled, it is possible for a totally blind user to use the PRS software
independently.
As the built-in speech is likely to clash with other screen reading packages,
it is recommended that you turn off other screen readers when launching the
PRS software. SHINANOKENSHI is unable to guarantee the proper function of PRS
or the built-in voice guidance if you use other screen reading software.
Return to Chapter
5 of ToC
Return to ToC
6 Configuring PRS
This chapter describes how to configure some of the features of the PRS
software basic operation. This includes altering the speech and display settings.
There is also information on setting up the default folder for recordings and
the default CDR/CDRW drive.
6.1 Customising the Voice Guidance feature
After installation of the PRS software, the Voice Guidance will be active
with default settings. You may wish to turn off the voice altogether or customise
it to your own preferences. This section describes how to make these alterations.
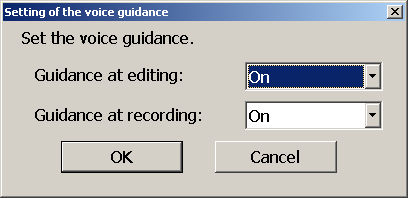
6.1.1 Turning the Voice
Guidance "On" or "Off"
The Voice Guidance can be on or off when editing your project. You can also
select to have voice guidance turned off during recording so that it is not
picked up in the audio. If, however, you turn the voice guidance off during
editing, this will also automatically disable it during recording as well.
To turn the Voice Guidance on or off, do the following:
6.1.2 Customising the voice options
In order to select a different voice or to adjust the settings such as speed,
pitch or volume, do the following:
- Select the "Option" menu from the Menu Bar or press "Alt+O".
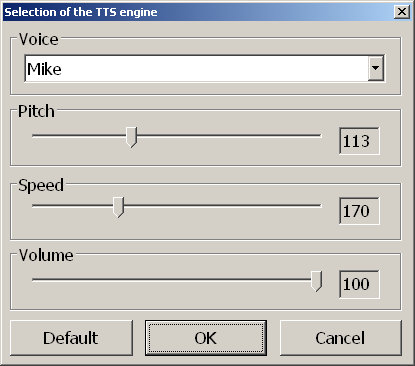
- On the drop down menu, select
the "Selection of the TTS Engine" option
or press "S". This will leave you in the dialogue box where
you can select a different TTS engine or make alterations to the existing
one.
- Press "Tab" or "Shift+Tab" to
move around this dialogue box and "Up" or "Down" Arrow
keys to make alterations to the various settings. Larger modifications
can be made by using the "Page
up" or "Page down" keys.
- The items that can be altered
are: the TTS engine used, pitch, speed and volume.
- When you are happy with your
alterations, press the "OK" button or
the "Enter" key.
- If you wish to cancel your alterations,
press the "Cancel" button
or the "Escape" key.
Note 1: The list of TTS engines
available to you in this dialogue will depend on other software you have
installed on your computer as well as PRS.
Note
2: If you make a mistake with your modifications to the pitch, speed
or volume, you can use the "Default" button
to reset these values to their original setting for that TTS engine.
Note 3: The settings you select
in this dialogue box will become the default settings when you start PRS
in the future.
6.2 Customising the display settings
This section describes how to modify the font size in lists and message boxes.
6.2.1 Modifying the list font size
The list font size affects the size of text in the Section and Phrase Lists
on the main screen. To modify the list font, do the following:
- Select the "Option" menu from the Menu Bar or press "Alt+O".
- Select the "List
font size" option from the drop down menu or press "F".
- From the list that
appears, use the "Up" or "Down" Arrows
to choose your desired setting. The options are Largest (G), Larger
(L), Smaller (S) and Smallest (A).
- Press the "Enter" key
to make your selection.
6.2.2 Modifying the message font size
The message font will affect the size of text you see in dialogue boxes. To
modify the message font, do the following:
- Select the "Option" menu from the Menu Bar or press "Alt+O".
- Select the "Message
font size" option from the drop down menu or
press "M".
- From the list that
appears, use the "Up" or "Down" Arrows
to choose your desired setting. The options are Largest (G), Larger
(L), Smaller (S) and Smallest (A).
- Press the "Enter" key
to make your selection.
Note: In both situations above, Largest is 2.5, Larger is 2.0, Smaller is
1.5 and Smallest is 1.0 times the standard Windows icon font size.
6.3 Setting the default folder for recordings
Before working with the software
it is worth taking a few moments to decide where you want your PRS projects
to be located. PRS allows you to specify
a default folder which can be an existing folder or a new one. This section
explains how to set the default folder for your system.
6.3.1 Setting an existing folder as the default folder
To set an existing folder to be your default folder, do the following:
- Select the "Option" menu from the Menu Bar or press "Alt+O".
- Select the "Recording" option
from the drop down menu or press "R".
- Alternatively you can
press "Control+R" directly from the main screen.
- This will take you to the "Recording Function" dialogue box. The
detail of this dialogue will be discussed later in this
manual.
- If you wish to enter
the folder name manually, tab round the dialogue box to the "Open
folder when new creation" edit box. Type in the desired
folder path and name and press "Enter" to confirm your
folder selection.
- If you wish to select
an existing folder from a folder list, tab round the dialogue box to the "Select
folder" button and press "Enter".
You will end up in another dialogue box.
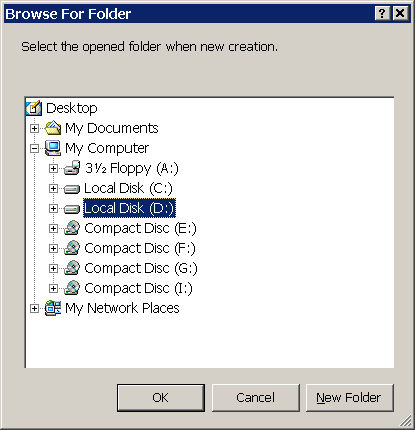
- Press "Shift+Tab" to
go to the folder list. Use your "Up" or "Down" Arrow
keys to select the required folder. The Right and Left Arrow
keys can be used to
open or close the list of sub folders respectively. Once you
have highlighted the required folder, press "Enter" to
confirm this selection. You will return to the "Recording
Function" dialogue box. Press "Enter" once
again to complete the process.
6.3.2 Creating a new folder to be the default folder
To create a new folder and set it as the default folder, do the following:
- Select the "Option" menu from the Menu Bar or press "Alt+O".
- Select the "Recording" option
from the drop down menu or press "R".
- Alternatively you can
press "Control+R" directly from the main screen.
- This will take you
to the "Recording Function" dialogue box. The
detail of this dialogue will be discussed later in this manual.
- Tab round the dialogue
box to the "Select file" button and press "Enter".
This will open another dialogue box.
- Press "Shift+Tab" to
go to the folder list. Use your "Up" or "Down" Arrow
keys to select the folder in which you wish to create your new
folder. The Right and Left Arrow keys can be used to open or close the
list of sub folders
respectively.
- Once you have highlighted
the required folder, press "Shift+Tab" to
select the "New folder" button and press "Enter".
- Type in the folder
name for the folder which will become the default folder. If you do not
type in a name, the default name
of "New folder" will
be assumed.
- Press the "Enter" key
to confirm the entry.
- Press "Enter" again
to confirm the selection of the new folder. This will return you to the "Recording
function" dialogue box. Press "Enter" one
last time to complete the process.
6.4 Selecting the default CD writer
Although you may not require to use the CD writing facility for some time,
it is a good idea to configure the software for this at an early stage to avoid
unnecessary errors later on. This section details how to set up the software
to work with your selected CD writer.
To configure the software to work with your desired CD writer, do the following:
6.5 Exercises for configuring PRS
You have now covered the basic methods of configuring the PRS software.
Before continuing, you may wish to practice some of these skills. Exercise
1 in Appendix A gives you some ideas of things to try.
Return to Chapter
6 of ToC
Return to ToC
7 Opening and Creating New Projects
This chapter details how to open existing projects from the hard disk and
how to create new projects. It also describes how to open existing completed
DAISY books from CD to prepare them for further editing.
7.1 Opening an existing projects
This section of the manual describes how to open an existing PRS project
from the hard disk. This can be done when the software is launched or from
within the programme after it is loaded. The dialogue box, which appears in
both cases, is identical.
The 2 methods of opening an existing project are detailed below. Following
this the dialogue box itself is described.
7.1.1 Method 1 - if you are not
already in the PRS software
- Launch the PRS as described in an earlier section of the manual.
- Select "Open" from
the "Selection of the Operation" dialogue
box which appears and press "Enter".
7.1.2 Method 2 - if you are already
using the PRS software
- Select the "File" menu from the Main Bar or press "Alt+F".
- Select "Open" from
the drop down menu or press "O".
- Alternatively you can
press "Control+O" directly from the main screen.
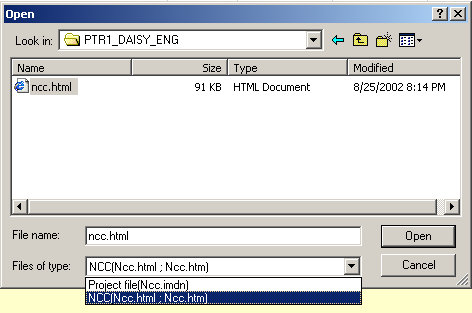
7.1.3 Description of the "Open" dialogue
box
Both methods above will
cause the "Open" dialogue box to appear.
It has 6 elements and can be navigated by pressing the "Tab" key
to move forwards or "Shift+Tab" to move backwards. The 6 elements
are as follows:
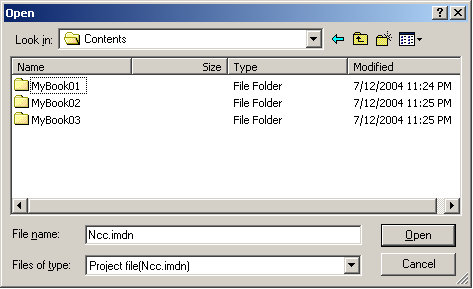
- File name edit
field -
type the required file name. You can use up to 63 alphanumeric characters
for the name of the project folder -
do not use spaces. Use "Alt+N" to
jump to this element from anywhere else in the dialogue box.
- Files of Type
combo box - select the type of file to be opened from the list provided. You
will be offered either "Project file (NCC.IMDN)" or "NCC
(NCC.HTML ; NCC.HTM)". To open an existing project, you should select
the Project file option. Use "Alt+T" to jump to this element
from anywhere else in the dialogue box.
- Look IN combo
box -
use the "Up" or "Down" Arrow keys to
locate the folder which contains your existing project and press "Enter" once
you have highlighted it. The contents of the folder will be displayed
in the list box provided. Use "Alt+I" to jump to this element
from anywhere else in the dialogue box.
- File List - this will
display the contents of the selected folder in the "Look
in" combo. Use your "Up" or "Down" Arrow
keys to move up and down the list or the initial letter of the file
you are looking for
(Note: PRS project files will always be called "NCC.IMDN").
To choose a file or folder in this list, highlight the item and press
the "Enter" key.
Use the "Backspace" key to move up one level in the folder
structure.
- Open button - once
you have selected the "NCC.IMDN" file for the
project you wish to open, press the "Open" button and
the project will be loaded.
- Alternatively you can
use "Alt+O".
- Cancel button - Tab
to the "Cancel" button and press "Enter" if
you no longer wish to open an existing project. You can also
press the "Escape" key
if you prefer.
7.2 Creating a new project
This section of the manual describes how to create a new PRS project.
This can be done when the software is launched or from within the programme
after it is loaded. The series of dialogue boxes, which appear in both cases,
are identical.
The 2 methods of creating a new project are detailed below. Following this
the 3 dialogue boxes themselves are described in the order that they appear.
7.2.1 Method 1 - if you are not
already in the PRS software
- Launch the PRS as described in an earlier section of the manual.
- Select "New" from
the "Selection of the Operation" dialogue
box which appears and press "Enter".
7.2.2 Method 2 - if you are already
using the PRS software
- Select the "File" menu from the Menu Bar or press "Alt+F".
- Select "New" from
the drop down menu or press "N".
- Alternatively you can
press "Control+N" directly from the main screen.
Having chosen to create a new project, you will be offered a series of 3 dialogue
boxes. The first is for setting the recording format for the project. The next
gives you an opportunity to specify a name and folder for your new project.
The third is for entering the book information if you wish. The 3 dialogue
boxes are described in more detail below:
7.2.3 Description of the "Recording Format" dialogue
box
The first dialogue box
to appear is the "Recording Format" dialogue.
This is used to specify the recording format you wish to use in the new project.
It has 3 elements and can be navigated by pressing the "Tab" key
to move forwards or "Shift+Tab" to move backwards. The 3 elements
are as follows:
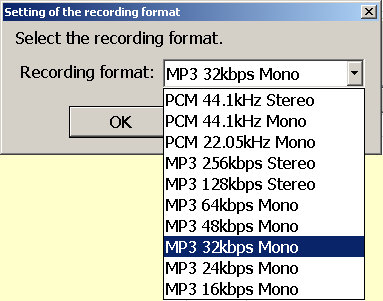
- Recording Format
combo box - use your "Up" or "Down" Arrow
keys to select your preferred recording format. You can choose from the
following10 formats: PCM 44.1 kHz Stereo, PCM 44.1 kHz Mono, PCM 22.05
kHz Mono, MP3
256 kbps Stereo, MP3
128 kbps Stereo, MP3 64 kbps Mono, MP3 48 kbps Mono, MP3 32 kbps Mono,
MP3 24 kbps Mono and MP3 16 kbps Mono. The PCM 44.1 kHz Stereo option
will give
the highest sound quality but will use the most disk space. A table showing
the recording times available for each recording format, on different types
of CD, is given at Appendix D, Table D2.
- OK button - once you
have selected the required recording format from the list provided, press
the "OK" button to accept your selection.
- Cancel button - Tab
to the "Cancel" button and press "Enter" if
you no longer wish to specify a recording format. You can also press
the "Escape" key
if you prefer.
Note: Once you select a
recording format, you will not be able to change it when the project is being
edited. You will, however, be able
to change the
format by using the "Audio Export" feature of the PRS software
which is described later, in this manual.
7.2.4 Description of the "Folder Name" dialogue
box
The second of the 3 dialogue
boxes is the "Folder Name" dialogue.
It is used to specify the name and location of the new project folder. It has
6 elements and can be navigated by pressing the "Tab" key to move
forwards or "Shift+Tab" to move backwards. The 6 elements are as
follows:
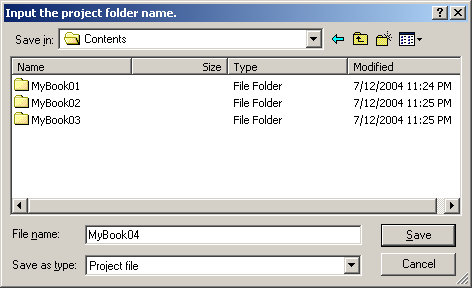
- File name edit
field -
type the required file name. You can use up to 63 alphanumeric characters
for the name of the project folder -
do not use spaces. Use "Alt+N" to
jump to this element from anywhere else in the dialogue box.
- Save as Type
combo box - in this instance, you are only offered the choice of "Project File" so
you do not require to specify anything in this field. Use "Alt+T" to
jump to this element from anywhere else in the dialogue box.
- Save IN combo
box -
use the "Up" or "Down" Arrow keys to
locate the folder where you wish to save your new project folder. Press "Enter" once
you have highlighted a folder in order to view its contents. These
will be displayed in the list box provided. Use "Alt+I" to
jump to this element from anywhere else in the dialogue box.
- File List - this will
display the contents of the selected folder in the "Save
in" combo. Use your "Up" or "Down" Arrow
keys to move up and down the list or the initial letter of the folder
you are looking for.
To choose a file or folder in this list, highlight it and press the "Enter" key.
Use the "Backspace" key to move up one level in the folder
structure.
- Save button - once
you have typed a name for the new project and specified the folder in which
it is to be saved, press the "Save" button.
- Alternatively you can
use "Alt+S". A confirmation dialogue box will
appear. Press the "Enter" key to confirm or the "Escape" key
to abort.
- Cancel button - Tab
to the "Cancel" button and press "Enter" if
you no longer wish to create a new project. You can also press
the "Escape" key
if you prefer.
7.2.5 Description of the "Book Information" dialogue
The last of the 3 dialogue
boxes is the "Book Information" dialogue
and is used to enter a range of important information about the original printed
book and about the people who have created the DAISY version. This information
can be completed at any time during the editing of the project up to the point
where the book is built. The dialogue has 11 main elements (apart from the "OK" and "Cancel" buttons)
and can be navigated by pressing the "Tab" key to move forwards or "Shift+Tab" to
move backwards. The 11 elements are nearly all simple edit boxes for entering
textual information.

A brief description of these elements follows:
7.3 Opening an existing book from CD
This section describes
how to open a finished DAISY book in order to do further editing. The
procedure is useful if you wish to use the
PRS to edit a recording
that you have created on the Plextalk PTR1/PTR2 portable recorder. The "DAISY
Import" feature is similar to the procedure described in this section
but it is more versatile. The "DAISY Import" feature is described
in detail in Section 14.1 of this manual.
In outline, opening an existing DAISY book involves: locating the required
NCC file, setting the correct audio format for the new project (if necessary),
selecting the folder where you wish to save the new project and running the
import process.
To carry out this process, do the following:
- Select "File" from the Menu Bar or press "Alt+F".
- Select "Open" from
the drop down menu or press "O".
- Alternatively you can
press "Control+O" directly from the main screen.
The "Open" dialogue will be displayed.
- Press "Tab" to
go to the "Files of Type" element.
- Use the "Up" or "Down" Arrow
keys to set the type to "NCC
(NCC.HTML ; NCC.HTM)".
- Tab to the "Look
In" box and select the drive where your CD book
is located.
- Tab to the list box
showing the contents of the selected drive and use the "Up" or "Down" Arrow
keys to select the folder which contains the finished book.
- Press "Enter" to
select this folder. You can use the "Backspace" key
to move up a level in the folder structure.
- When you have located
the required folder, the list box should display one NCC file with either
an "HTML" or "HTM" file extension.
- Select the file and
press "Enter". This will start the process of
opening your book.
- If the audio format
of the existing book is not recognised by the PRS software, the "Recording
Format" dialogue will appear.
Select the desired audio format from the list and press "Enter".
- Next a dialogue box
will appear which prompts you to specify a project name and a location
where you wish
to save the
imported project.
Type in a project
name and specify the required location in the list
box provided. When complete, tab to the "Save" button
and press "Enter" or press "Alt+S".
- A confirmation dialogue
box will appear. Press "Enter" to confirm
that you wish to save the new project in this location.
- After confirming this
dialogue box, the import process will start. During this process, the
Voice Guidance
will intermittently
say "Running". If
you wish to check the progress of this procedure
at any time, press the "F12" or "F9" key
and the percentage complete will be spoken.
Note 1: When saving the new project, the file name can include up to 63 alphanumeric
characters. Do not use spaces.
Note 2: If you are importing a large project, this process may take some time
so be patient.
7.4 Exercises
for opening projects and existing books
You should now have a good idea of how to open existing projects and books.
If you would like to practice these procedures, Exercise 2 in
Appendix A sets
you some simple tasks.
Return to Chapter
7 of ToC
Return to ToC
8 Navigating and playing projects
This chapter explains how to navigate around your project and how to play
sections and phrases. It also explains how to use some of the additional navigation
features of the PRS software.
8.1 Navigating sections and phrases
To navigate around the Section or Phrase Lists, do the following:
- Press "Tab" to select the Section List or the Phrase List. The Voice
Guidance will say "Section" or "Phrase" to indicate the
list you have moved to.
- Once you have selected
the list you want, use your "Up" or "Down" Arrows
to go to the section or phrase you wish to play.
- Additionally, you can
use "Home" or "End" to move to the
first or last section or phrase in the Section or Phrase List you are
in.
8.2 Playing sections or phrases
To play or stop a section or phrase, do the following:
- Select the required section or phrase as above.
- Press the "Left" or "Right" Arrow
key. In the Section List, the first phrase will play and then stop. In
the Phrase List, the selected
phrase will play and then stop.
- To stop play, select "Stop" from
the "Control" drop down
menu or press the "Spacebar".
8.3 Continuous play
To play continuously, do the following:
- Select "Play Continuously" from the "Control" drop down
menu or press "F5" from the main screen. The project will play continuously
from the start of the selected section or phrase until the end of the project.
- To stop continuous
play, select "Stop" from the "Control" drop
down menu or press "Spacebar".
8.4 Adjusting playback speed
To adjust the playback speed, do the following:
8.5 Adjusting playback volume
To adjust the playback volume (Wave out volume), do the following:
8.6 Getting section and phrase information
This section describes how to obtain section and phrase information.
To acquire section or phrase information, do the following:
- Select the section or phrase you want information about.
- Press the "F12" or "F9" key
to hear the information for that item.
- In sections, the Voice
Guidance will speak the Section number, the Section heading, the Section
level, the number of phrases in the section and
the total time to play the section.
- In phrases, the Voice
Guidance will speak the Phrase number, the Phrase attributes (such as page
or group information), the Length of the
phrase, the amount of
pause time in the phrase and the file name where the audio is stored.
8.7 Searching for heading text
A section heading is the text associated with the section. The heading information
can be used to search for a section in the project.
To search for heading text, do the following:
- Select the "Find" option from the "Move" drop down menu
or press "Control+F". The search dialogue box will appear.
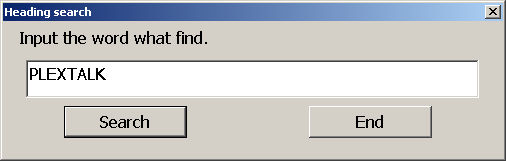
- Type in the text you
wish to search for and press "Enter".
PRS will locate the first section whose heading contains the specified
text. The
first phrase of the section which has been found will be played.
- If you wish to continue
searching for the same text, press the "Enter" key
again.
- If you have found the
section you were looking for, press "Tab" to
go to the "End" button and press "Enter" or
press the "Escape" key.
The find dialogue box will disappear and the section containing
the text that was searched for last will be highlighted.
- If the specified text
is not found in any of the headings, a dialogue box will inform you of
the search failure. Press the "Enter" key
to return to the main screen. If you wish to search for different
text, repeat the procedure
above.
8.8 Jumping to Pages
To jump forwards or backwards to the next page, do the following:
- To jump from the current
phrase position to the next page, select the "Next
Page" option from the "Move" drop down menu or press "Control+Down
Arrow".
- To jump from the current
phrase position to the previous page, select the "Previous
Page" option from the "Move" drop down menu or press "Control+Up
Arrow".
8.9 Jumping to Groups
To jump forwards or backwards to the next group, do the following:
- To jump from the current
phrase position to the next group, select the "Next
Group" option from the "Move" drop down menu or press "Shift+Right
Arrow".
- To jump from the current
phrase position to the previous group, select the "Previous
Group" option from the "Move" drop down menu or press "Shift+Left
Arrow".
8.10 Jumping to Marks
To jump forwards or backwards to the next mark, do the following:
- To jump from the current
phrase position to the next mark, select the "Next
Mark" option from the "Move" drop down menu or press "Control+Right
Arrow".
- To jump from the current
phrase position to the previous mark, select the "Previous
Mark" option from the "Move" drop down menu or press "Control+Left
Arrow".
8.11 Jumping to Events
To jump forwards or backwards to the next event, do the following:
- To jump from the current
phrase position to the next event, select the "Next
Event" option from the "Move" drop down menu or press "Shift+J".
- To jump from the current
phrase position to the previous event, select the "Previous
Event" option from the "Move" drop down menu or press "Shift+F".
8.12 Exercises
in playing and moving
around a project
You should now have a good knowledge of how to move around a project and play
sections and phrases. Exercise 3 in Appendix A gives you an opportunity to
try out these skills in a real project.
Return to Chapter
8 of ToC
Return to ToC
9 Recording
This chapter details how to set up your computer and software to make a recording.
9.1 Checking the Volume Control options for the computer
Before trying to record a project, it is worth checking the Volume Control
settings within your operating system. You will need to ensure that the devices
that you intend to use for recording, such as the microphone or line in sockets
on your sound card, have been activated in the Windows Volume Controls. If
this has not been done, you will not be able to record in the PRS software.
For further information on how to make these checks, refer to your Windows
Help system.
9.2 Selecting the required input device
Having ensured that your Windows system is properly configured, you now need
to set up the PRS to accept audio input from the correct source. You can
choose to record from the microphone socket or from the line in socket on your
sound card. If you want to make a live recording you would probably want to
use your microphone. If you wished to record from another device such as a
cassette player or CD player, you would use the Line in option.
To set up the PRS software for either of these input sources, do the following:
- Select the "Control" menu from the Menu Bar or press "Alt+C".
- Select the "Selection
of the Recording Volume Control" option from
the drop down menu or press "V".
- This will open a sub
menu with 2 items, "Line" and "Microphone".
Use the "Up" or "Down" Arrow keys to select the
option you wish to use for the recording input and press the "Enter" key.
9.3 Confirmation of the storage information
Either before or after recording, you may wish to check the recording capacity
of your system. This section details how to acquire information such as the
recording format, the recorded time, the disk space used, the available recording
time and the available disk capacity.
To acquire the storage information, do the following:
- Select the "Tool" menu from the Menu Bar or press "Alt+T".
- Select the "Storage
Information" option from the drop down menu or
press "S".
- Alternatively you can
press "Control+S" directly from the main screen.
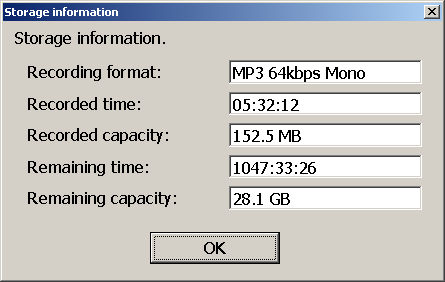
- A dialogue with this
information will appear. Press "Enter" when
you have read the required details. If you wish the Voice Guidance
to repeat the information, press the "F9" or "F12" key.
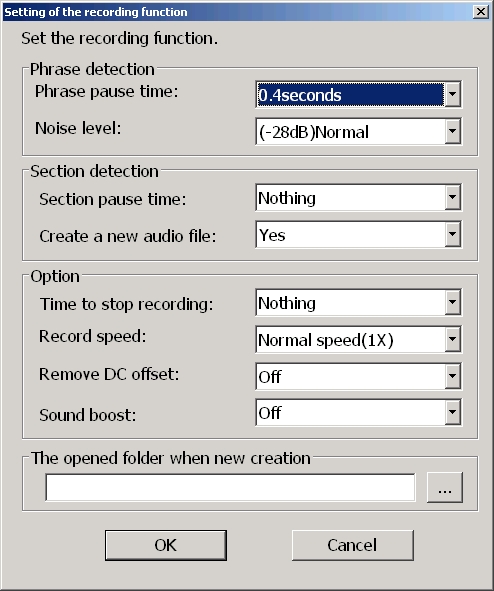
9.4 Setting up the recording functions
Several recording features can be customised by the producer of the DAISY
project. These include the phrase pause time, noise level, section pause time,
whether to create a new audio file or not, time to stop recording and the recording
speed. This section outlines the purposes of each of these settings and how
to make changes.
To access the "Recording Function" dialogue
box,
do the following:
- Select the "Option" menu from the Menu Bar or press "Alt+O".
- Select the "Recording" option
from the drop down menu or press "R".
- Alternatively, you
can press "Control+R" directly from the main screen.
- This will open the "Recording
Function" dialogue box where you can
alter the following settings. Use the "Tab" key to move
around the dialogue. Press the "OK" button to confirm alterations
or "Cancel" to
abort the changes.
9.4.1
Phrase pause time
The phrase pause time
is the amount of silence that the PRS software will accept before automatically
creating a
new phrase. Pause times can be set in increments
of 0.1 seconds, in the range 0.1 seconds to 1.0 seconds. The default
setting on installation is 0.4 seconds.
9.4.2 Noise level
The noise level is the level of
background noise. If this is high, PRS will find it difficult to split phrases
and the recording will be
one long
phrase. If there is no background noise, you may end up with too many phrases.
PRS offers you 10 noise levels, from -20dB to -40dB. The default setting
is normal. If the background noise is high, set this option to "High" and
if there is no background noise, set the option to "Low". Low
noise levels are typically around -40 dB, normal noise level is around
-28 dB and
High noise level is around -20 dB.
9.4.3 Section pause time
The section pause time
is the amount of silence that PRS will allow before automatically creating
a new section
and continuing to record. This is
particularly useful when recording from tape cassettes and other media
as it can greatly
reduce the editing time required. The Section Pause time can be set in
increments of 1 second in the range of 1 second up to 5 seconds. This
setting can be
ignored if set to "Nothing". The default setting is "Nothing".
Note: The Section Pause
time is only valid in "Overwrite" recording
mode.
9.4.4
Create a new audio file
This setting allows you to specify
if PRS should take a new audio file when a new section is created. The default
setting is "Yes". If
you are recording in a location where the recording level is low such as
in a conference or lecture room, set this setting to "No" and
you should be able to record the low levels.
9.4.5 Time to stop recording
This setting would generally
be used when recording from cassette or other device. The setting can be
used
to specify an amount of silence after which
the recording will stop automatically. The available settings are 10 seconds,
20 seconds, 30 seconds, 1 minute, 2 minutes, 3 minutes, 4 minutes and 5
minutes. This setting can be ignored if set to "Nothing".
The default setting is "Nothing".
9.4.6 Recording speed
This can be set to "Normal" (1x)
or "Double" (2x) speed
and is useful if you have a cassette player or other device which can play
at double speed. This will half the time to record from that device. For
normal use, set this to "Normal" and set it to "Double" if
using a device capable of playing at double speed.
9.4.7 Remove DC offset
This option may help to reduce static
noise from DC power sources. Noise of this kind can cause problems with phrase
detection and it is recommended
that, if you have tried changing the "Noise Level" options without
success, you should try this option. There are 2 settings, "On" and "Off".
The default setting is "Off".
9.4.8 Sound Boost
This option makes recording volume larger as selected decibel.
Please enable this option when input volume of the sound device can not achieve
the level you want. However, if sound contains certain noise, please turn off sound boost
because sound boost amplifies the noise as well.
9.4.9 Open folder when
new creation and "Select Folder"
By using these 2 elements, you can
specify a default folder for all project recordings. These were described
in more detail earlier in the manual.
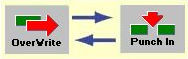
9.5 Selecting the recording mode
Within the PRS software,
there are 2 recording modes that can be used. These are "Overwrite" and "Punch-in" modes.
This section explains the meaning of these modes and describes how to select
the desired
mode for recording.
9.5.1 Changing recording mode
To change from "Overwrite" to "Punch-in" mode
or vice versa, do the following:
9.5.2 Recording in "Overwrite" mode
"Overwrite" mode
allows the producer to overwrite the whole of a specified section, from the
selected phrase onwards, regardless
of how long
the original section was or how long the new recording is. The new recording
will overwrite all phrases in the current section from the selected phrase
onwards. It will not overwrite audio in the following sections!
To record in "Overwrite" mode,
do the following:
- Ensure that you have selected "Overwrite" mode
recording as detailed above.
- Move to the phrase
which is the first phrase in the section that is to be overwritten.
- Select the "Control" menu
from the Menu Bar or press "Alt+C".
- Select "Record" from
the drop down menu or press "R".
- Alternatively, you
can press "F8" directly from the main screen.
- This will place you
in a test recording mode. At this point you can adjust the recording volume
for this section of the project. The Voice
Guidance will indicate if the level is "High", "Good" or "Low".
- Once you are happy
with the recording level, press "F8" a second
time and the recording will start.
- To stop recording,
select "Stop" from the "Control" drop
down menu or press the "Spacebar".
Note 1: If you do not wish
to use the test recording mode, press "Shift+F8" and
recording will start immediately.
Note 2: When you start to record, the system will stay on pause until an audio
input is detected by the software. Once the audio is detected, recording will
start automatically.
Note
3: To create a new section whilst recording, press the "Insert" key
- ensure that the number lock is "Off" - this does not work in "Punch
in" mode.
9.5.3 Recording in "Punch-in" mode
"Punch-in" mode
enables the producer to insert audio at the selected location, without overwriting
any audio. It can also be used
to overwrite specified
phrases in the selected section.
To record in "Punch-in" mode,
do the following:
- Ensure that you have selected "Punch-in" mode
recording as detailed above.
- Move to the phrase where you want to insert or punch-in your new audio.
- Select the "Control" menu
from the Menu Bar or press "Alt+C".
- Select "Record" from
the drop down menu or press "R".
- Alternatively, you
can press "F8" directly from the main screen.
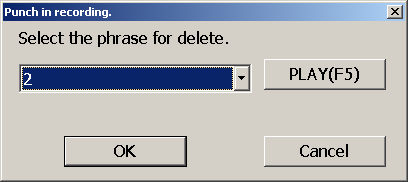
- The "Punch-in" dialogue
box will appear. This allows you to specify the phrases, in the current
section, that are to be overwritten.
- If you do not want
to overwrite any phrases (i.e. you want to insert new audio without deleting
any existing audio), you
should select "Nothing" in
this dialogue.
- If you wish to delete
some phrases in the section and replace them with the new audio, use the "Up" and "Down" Arrow
keys to select the phrases to be replaced.
- If selecting multiple
phrases, you can only select phrases that are next to each other. Move
to the first phrase to
be removed,
hold
down the "Shift" key
and press "Down Arrow" until all required phrases
are selected.
- When you have made
your selection, press "Enter" to confirm.
- This will place you
in a recording monitoring mode. At this point you can adjust the recording
volume for
this section
of the project.
The
Voice Guidance will
indicate if the level is "High", "Good" or "Low".
- Once you are happy with
the recording level, press "F8" a second
time and the recording will start.
- To stop recording,
select "Stop" from the "Control" drop
down menu or press the "Spacebar".
Note 1: When selecting
phrases to be deleted, you can press "F5" to
hear a phrase you have selected or press "Shift+F5" to hear all the
phrases that have been selected.
Note 2: When you start to record, the system will stay on pause until an audio
input is detected by the software. Once the audio is detected, recording will
start automatically.
Note
3: You cannot insert
sections when recording in "Punch in" mode.
Note
4: PRS will only allow you to record into a single section at a time, whether
in "Overwrite" or "Punch-in" mode.
9.6 Adjusting the recording volume
When making a recording
it is important that the recording volume is neither too high nor too low.
If it is too high, the recording
will be "clipped" and
the recording may well be distorted to listen to. If the recording volume is
too low, it may be difficult to hear. In both these cases, the phrase detection
may not work properly.
You should be aiming to record in a middle range to avoid both situations.
This section describes how to adjust the recording volume.
To adjust the recording volume, do the following:
- Select the "Control" menu from the Menu Bar or press "Alt+C".
- Select the "Record" option
from the drop down menu or press "R".
- Alternatively, press "F8" directly
from the main screen.
- This will place you
in the test recording mode.
- Now adjust the recording
volume as required.
- The best way to do
this is to speak a word at a time and then pause to listen to the feedback
from the PRS software.
- If using the Voice
Guidance, you will hear "High", "Good" or "Low".
You should adjust the recording volume until you hear "Good" most
often.
- To increase the recording
volume, select "Input volume up" from the "Control" drop
down menu or press "F4".
- To decrease the recording
volume, select "Input volume down" from
the "Control" drop down menu or press "Shift+F4".
- During this process,
you should check that the phrase detection appears to be functioning well.
This can be gauged by
speaking several short
sentences
and viewing the number of phrases that have been detected
during the test recording process. This information is
visible in
the Monitoring Display area of the
screen or can be listened to by pressing the "F12" or "F9" keys.
Note 1: "Low" indicates a peak level lower than -12 dB, "Good" indicates
a peak level between -12 dB and -3 dB and "High" indicates a peak
level which is -3 dB or higher.
Note 2: If setting the recording volume visually, you should set the level
to be around -10 dB.
9.7 Exercises for practicing recording
techniques
You should now have a good understanding of the main issues involved in making
a recording with the PRS software. If you would like to try some practical
exercises in recording, see Exercise 4 in Appendix A.
Return to Chapter
9 of ToC
Return to ToC
10 Editing
This chapter focuses on how you can edit your project including manipulating
the recorded information and structuring in the DAISY features such as pages
and groups. At the end of this part of the manual you should be able to record
and edit using most of the facilities in the PRS software.
10.1 Selecting multiple sections or phrases
Selecting multiple phrases or sections in a PRS project, is very similar
to selecting multiple items in other Windows list boxes. The process is as
follows:
10.2 Standard editing commands for phrases and sections
Now that you know how to select single and multiple phrases and sections,
it is simple to action a number of the basic editing features of the PRS
software. Many of the commands will be familiar from other Windows based programmes.
Below is listed some of the most useful commands:
- Cut selection - press "Control+X" or select "Cut" from
the "Edit" menu.
- Copy selection - press "Control+C" or
select "Copy" from
the "Edit" menu.
- Paste selection - re-position
the highlight where you wish to insert the phrases or sections being copied
or moved and then press "Control+V" or select "Paste" from
the "Edit" menu.
- Undo previous edit
- press "Control+Z" or select "undo" from
the "Edit" menu.
- Delete selection -
press "Delete" or select "Delete" from
he "Edit" menu.
10.3 Editing a section
This part of the manual deals with some of the basic editing commands for
working with sections.
10.3.1 Joining sections
To join 2 or more sections together, do the following:
- Select the sections to be joined, as above.
- Select the "Edit" menu
from the Menu Bar or press "Alt+E".
- Select the "Join" option
from the drop down menu or press "J".
- Alternatively, you
can press "Control+M" from the main screen.
- A confirmation box
will appear. Press "Enter" to proceed or "Escape" to
cancel.
10.3.2 Splitting a section
On occasions it will be necessary to split a section into smaller parts. The
procedure to do this is explained below:
- Go to the Section List and select the section that you wish to split.
- Press "Tab" to
move to the Phrase List for that section.
- Locate the phrase that
is to be the first phrase of the new section.
- Select the "Edit" menu
from the Menu Bar or press "Alt+E".
- Select the "Split
Section" option from the drop down menu or press "O".
- Alternatively, you
can press "Control+Q" from the main screen.
- A confirmation box
will appear, press "Enter" to accept the split
or "Escape" to cancel.
- The result will be
the creation of a new section with the phrase which was at the split point
being the first phrase in the
new section.
10.3.3 Deleting sections
To delete a section, do the following:
- Select the section or sections to be deleted.
- Select the "Edit" menu
from the Menu Bar or press "Alt+E".
- Select the "Delete" option
from the drop down menu or press "D".
- Alternatively, you
can press the "Delete" key directly from the main
screen.
10.3.4 Deleting all sections
If you wish to delete all the sections in a project, do the following:
- Go to the Section List
by pressing "Tab" until the Voice Guidance
announces "Section".
- Select the "Edit" menu
or press "Alt+E".
- Select the "Delete
All" option from the drop down menu.
- A confirmation dialogue
box will appear, press "Enter" to confirm
the deletion of all the sections or "Escape" to cancel.
10.3.5 Inserting a new section
If you wish to insert a new empty section, do the following:
- Go to the Section List and locate the position for the new section to be inserted.
- Select the "Edit" menu
from the Menu Bar or press "Alt+E".
- Select the "Insert
Section" option from the drop down menu or press "Shift+Insert".
- A confirmation box
will appear. Press the "Enter" key to confirm,
and the new empty section will be created, or press "Escape" to
cancel.
10.4 Editing phrases
This section deals with some of the basic commands used for editing phrases.
10.4.1 Joining phrases
- Select the phrases to be joined, as above.
- Select the "Edit" menu
from the Menu Bar or press "Alt+E".
- Select the "Join" option
from the drop down menu or press "J".
- Alternatively, you
can press "Control+M" from the main screen.
- A confirmation box
will appear. Press "Enter" to proceed or "Escape" to
cancel.
Note 1: Phrases to be joined must be contiguous.
Note
2: If the error message "Unable to join these phrases" appears,
you should carry out one of the following actions. If the audio format of your
project is "PCM", run the "Build Book" process from the "Tool" menu.
If the audio format of your project is "MP3" run the "Audio
Export" process from the "Tool" menu.
10.4.2 Splitting a phrase
On occasion you may wish to split a phrase to break down a long phrase into
smaller pieces. This can be done as follows:
- Select the phrase you wish to split.
- Select the "Edit" menu
from the Menu Bar or press "Alt+E".
- Select the "Split
Phrase" option from the drop down menu or press "H".
- Alternatively, you
can press "Control+P" directly from the main screen.
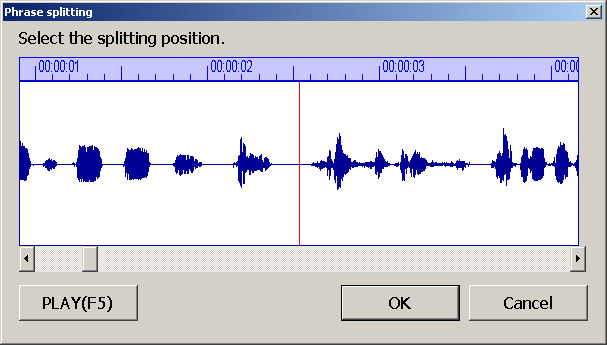
- The Voice Guidance
will ask you to select the splitting position.
- Now use the "Left" and "Right" Arrow
keys to adjust the splitting position to the desired position in the phrase.
You can press these
keys one press at a time or you can hold down the keys to scroll
through the recording more quickly. Holding down the "Shift" key
in combination with the "Arrow" keys will allow you to jump backwards
or forwards 1 second at a time. Use the "Shift" key with "Left
Arrow" or "Up
Arrow" to move backwards. Use the "Shift" key
with "Right
Arrow" or "Down Arrow" to move forwards.
- The phrase will be
played, each time you move, from the selected split position forwards in
the recording. This way you can
hear where the
split will occur
before making the Change.
- Once you are happy
that you have chosen the correct position for making the split, press the "Enter" key.
- A confirmation dialogue
box will appear, press "Enter" to confirm
the split or "Escape" to cancel your selected
position and adjust the split position further.
Note 1: When you start
the splitting process, the splitting position will always start at the beginning
of the phrase to be split, so
pressing the "Left
Arrow" key at the start, will have no effect.
Note 2: You will be unable to split a phrase if you are positioned at the
beginning or end of the phrase.
Note
3: During the splitting process, pressing the "F5" key
will cause the Voice Guidance to speak from the split position. Pressing
it again
during the audio playback will stop the audio output.
Note
4: If you wish to cancel the splitting process at any time whilst
selecting the split position,
press the "Escape" key
to return to the main screen.
Note 5: If you click on the phrase wave form with the right mouse button,
the whole wave form will be displayed. Clicking a second time with the right
mouse button will return the screen to normal.
10.4.3 Deleting a phrase
To delete a phrase, do the following:
- Select the phrase or phrases to be deleted.
- Select the Edit" menu
from the Menu Bar or press "Alt+E".
- Select the "Delete" option
from the drop down menu or press "D".
- Alternatively, you
can press the "Delete" key directly from the main
screen.
10.4.4 Deleting all phrases
If you need to, you can delete all the phrases in a selected section. This
can be done as follows:
- In the Section List, select the section that all the phrases are to be deleted
from.
- Press "Tab" to
move to the related Phrase List.
- Select the "Edit" menu
from the Menu Bar or press "Alt+E".
- Select the "All
Delete" option from the drop down menu or press "E".
- A confirmation dialogue
box will appear. Press "Enter" to confirm
the deletion or "Escape" to cancel.
10.5 Undoing editing
Similar to a word processor, PRS allows you to undo previous edits. You
can undo the previous 10 edits in reverse order. In the event that you wish
to undo editing, do the following:
- Select the "Edit" menu from the Menu Bar or press "Alt+E".
- Select the "Undo" option
from the drop down menu or press "U".
- Alternatively, you
can press "Control+Z" directly from the main screen.
- You can repeat this
process for the previous 10 edits, in reverse order.
Note 1: The "Undo" command
is valid for the following editing commands: Join, Split, Delete, All Delete,
Insert, Cut, Paste, Page
setting, Group setting,
Mark setting, Level setting, Section property and Phrase property.
Note
2: The "Undo" command
will not work for undoing recording, DAISY import, Audio Import, Audio Export,
Text Import, Build Book
and CD Writing.
10.6 Editing the section properties
For every section in the
project, there are 2 pieces of information that will always be present. These
are the section heading and the section
level. Assuming
that you have not previously made alterations to a section's properties, the
default text for every heading will be "Heading" and the default
level will be Level 1. Although you can leave these unaltered, the information
in the section properties is much more meaningful if it is customised to suit
the particular project. It also makes it possible to search for particular
sections by use of the heading text.
The information can be
modified either manually, one section at a time, or by using the "ToC Import" feature of the PRS software. This feature will be discussed in the next chapter
of this manual.
The section properties contains the information that makes up the Table of
Contents for the DAISY project. This section describes how to edit the section
properties manually. Manual editing is likely to be used when there are only
a small number of sections in the project or when there is only a small amount
of editing required.
10.6.1 Editing the section heading
To edit a section's heading, do the following:
- Select the Section List
on the main screen by pressing "Tab".
- Select the section
you wish to edit and then select the "Edit" menu
from the Menu Bar or press "Alt+E".
- Select the "Property" item
on the drop down menu or press "R".
The "Section Properties" dialogue box will appear with the
highlight on the "Level" element.
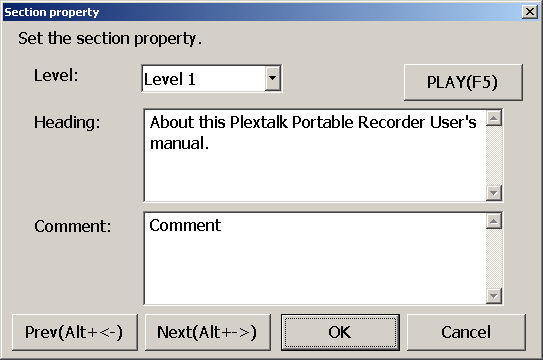
- Alternatively, you
can press the "Enter" key directly from the main
screen.
- Press the "Tab" key
to move to the "Heading" element.
- Type in the appropriate
text for the section heading.
- If you wish to edit
the previous or next section information, press the "Previous" or "Next" section
buttons or use "Alt+Left Arrow" or "Alt+Right
Arrow" respectively.
- If you wish to hear
the first phrase of the section, press the "Play" button
or press "F5". The first phrase will play and then
stop.
- When you have finished
editing, press "Enter" to confirm the changes
or "Escape" to cancel.
10.6.2 Editing the section level
Every section in a PRS project can be assigned a level from 1 to 6. Level
1 is the highest level of navigation and Level 6 is the lowest. The default
setting for a new section is Level 1. You may wish to alter the assigned level
for a section, in order to make the navigation of your project more specific.
This section details how to raise or lower the section levels.
To raise the level for a section, do the following:
- Select the section that is to have its level raised.
- Select the "Edit" menu
from the Menu Bar or press "Alt+E".
- Select the "Level
Up" option from the drop down or press "V".
- Alternatively, you
can press "F11" directly from the main screen.
To lower the level of a section, do the following:
- Select the section that is to have its level lowered.
- Select the "Edit" menu
from the Menu Bar or press "Alt+E".
- Select the "Level
Down" option from the drop down menu or press "W".
- Alternatively, you
can press "Shift+F11" directly from the main screen.
Note 1: If you wish to adjust the level of multiple sections, select the desired
sections and use the same process as above to raise or lower the level as appropriate.
Note
2: The level information is also available on the section properties dialogue
box. Open the section
properties and make alterations
to the level
element by using the "Up" or "Down" Arrow keys. Press "Enter" to
confirm the changes.
10.7 Setting and removing page information
The PRS software allows
you to specify phrases in the project that are to be marked as "pages".
The page marker adds extra navigation functionality to the DAISY project.
This can be particularly useful where
the original text
does not have many other natural break points, such as novels, which may only
have chapters and paragraphs. It is also very useful in reference works as
a means to find information quickly.
The PRS software allows you to use 4 types of page coding as follows:
Auto page, Manual page, Front page and Special page.
This section explains each of the page codings and how to use them.
10.7.1 Auto page numbering
The auto page numbering feature allows you to place page codes on phrases
in your project. Having inserted these page codes, they will automatically
number themselves according to their position relative to the other page codes.
The first code will become Page 1, the second will be Page 2 and so on. There
is no need to enter specific page numbers.
To enter an automatic page code, do the following:
- Select the phrase which
is to be given the "Page" coding.
- Select the "Edit" menu
from the Menu Bar or press "Alt+E".
- Select the "Page" option
from the drop down menu or press "A".
The phrase will be coded with an automatic page tag.
- Alternatively, you
can press "P" directly from the main screen.
Note 1: As you enter automatic
page codes into the project, a small cross will be added under the "Page" column. Pressing the "F12" or "F9" key
will cause the Voice Guidance to announce the phrase number followed by "Attributes
Page Automatic" along with the other phrase information.
Note
2: If you wish to determine the currently assigned page number for
that phrase, you need to
refresh the information on the screen.
Do this by selecting "Refresh" from
the "Edit" menu or by pressing either "Control+L" or "F10" directly
from the main screen. The small cross will change to the relevant page number.
After refreshing the information, pressing "F12" or "F9" will
cause the Voice Guidance to say "Attribute Page Automatic Number XX" (where
XX is the calculated page number at that time), along with the other phrase
information.
Note
3: Any time you add or remove automatic page codes from the project, you must
use the "Refresh" function
to determine the new page number in the project.
10.7.2 Manual page numbering
You can choose to enter a specified page number rather than using the automatic
page numbering. You might want to do this in various situations, for example,
if you are creating a DAISY version of only part of the original text and want
the page numbers to still match the original.
To enter a manual page number, do the following:
- Select the phrase to which the page code is to be assigned.
- Select the "Edit" menu
from the Menu Bar or press "Alt+E".
- Select the "Properties" option
on the drop down menu or press "R".
- Alternatively, you
can press the "Enter" key directly from the main
screen.
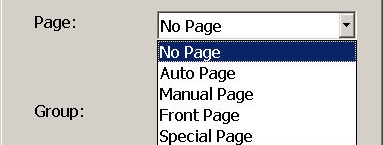
- You will be on a list
where you can select the type of page (No Page, Auto page, Manual page,
Front page or Special page).
- Use the "Up" or "Down" Arrow
keys to select "Manual".
- Press "Tab" to
move to the edit box where you can enter a page number. Enter the required
page number and press "Enter" to confirm or "Escape" to
cancel.
Note 1: Manual page numbers
must be specified in sequence. If they are not, an error message will be
displayed when you execute the "Refresh" command
(F10).
Note 2: Manual page numbering can be used in combination with automatic page
numbering. For example, if a phrase has a manual page set to be Page 10 and
phrases later in the project are coded as automatic pages, the first page after
the manually set page will become Page 11 and the next one will become Page
12 and so on.
Note
3: When a manual page has been specified, the page number will appear in parentheses "(" and ")" on the phrase list under the "Page" column.
Pressing the "F12" or "F9" keys will cause the Voice Guidance
to say "Attribute Page Manual Number XX" (where XX is the specified
page number), along with the other phrase information.
10.7.3 Front page option
In printed books, the pages
before the main content of the book are often numbered with Roman style numbering
such as "i", "ii", "iii", "iv" and
so on. You can use the "Front Page" option in the PRS software
to enter this type of page numbering in your DAISY project, in order to match
the original text.
To enter a "Front" page
code, do the following:
- Select the phrase to which the page code is to be assigned.
- Select the "Edit" menu
from the Menu Bar or press "Alt+E".
- Select the "Properties" option
on the drop down menu or press "R".
- Alternatively, you
can press the "Enter" key directly from the main
screen.
- You will be on a list
where you can select the type of page (No Page, Auto page, Manual page,
Front page or Special page).
- Use the "Up" or "Down" Arrow
keys to select "Front".
- Press "Tab" to
move to the edit box where you can enter a page number. Enter the required
page number and press "Enter" to confirm or "Escape" to
cancel.
Note: When you specify
a front page code, the page number specified will appear in square brackets "[" and "]", under the "Page" column
of the phrase properties. Pressing the "F12" or "F9" keys
will cause the Voice Guidance to say "Attribute Page Front XX" (where
XX is the specified front page number), along with the other phrase information.
10.7.4 Special page option
The special page option
can be used to specify non-standard page numbering such as "1-34" or "1-iv", where the hyphen "-" is
used to separate numbers which can be standard numbers or Roman numerals.
To set a "Special" page
code, do the following:
- Select the phrase to which the page code is to be assigned.
- Select the "Edit" menu
from the Menu Bar or press "Alt+E".
- Select the "Properties" option
on the drop down menu or press "R".
- Alternatively, you
can press the "Enter" key directly from the main
screen.
- You will be on a list
where you can select the type of page (No Page, Auto page, Manual page,
Front page or Special page).
- Use the "Up" or "Down" Arrow
keys to select "Special".
- Press "Tab" to
move to the edit box where you can enter a page number. Enter the required
page number and press "Enter" to confirm or "Escape" to
cancel.
Note: After entering a
special page number on a phrase, the specified number will appear in angle
brackets "<" and ">" under the "Page" column
on the phrase properties. Pressing the "F12" or "F9" keys
will cause the Voice Guidance to say "Attribute Page Special XX" (where
XX is the specified number), along with the other phrase information.
10.7.5 Removing page codes from a phrase
If you wish to remove the page coding from a phrase, do the following:
10.7.6 Deleting all page codes from the project
If you wish to delete all the page codes from the project, do the following:
- Select the "Edit" menu from the Menu Bar or press "Alt+E".
- Select the "Delete
all pages" option from the drop down menu or press "S".
- A confirmation dialogue
box will appear. Press "Enter" to confirm
or "Escape" to cancel.
- If confirmed, all page
codes will be deleted from the entire project.
10.8 Setting and removing group information
A group code can be specified for any phrase in a project apart from the first
phrase in any section. You may wish to use this code for marking the first
phrase in a paragraph, a note, a warning or safety related item or for other
items such as tables or pictures. Essentially this code can be used by the
project producer as a 'wild card' type of coding.
To set the group code on a phrase, do the following:
10.8.1 Setting the group code in the phrase properties
- Select the required phrase.
- Select the "Edit" menu
from the Menu Bar or press "Alt+E".
- Select the "Properties" option
from the drop down menu or press "R".
- Alternatively, you
can press "Enter" directly from the main screen.
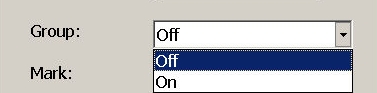
- The phrase properties
dialogue box will appear.
- Tab round to the "Group" element
and set it to "On" by
using the "Up" or "Down" Arrow keys.
- Press "Enter" to
confirm the setting or "Escape" to cancel.
10.8.2 Setting the group code directly
10.8.3 Removing the group coding
To remove the group coding from a phrase, do the following:
10.9 Marks
Marks are a method by which the producer of the project can easily find a
particular phrase in the project. Essentially it is a way of tagging the phrase
for future attention.
To set a mark on a phrase, do the following:
10.9.1 Inserting a mark using the phrase properties
- Select the required phrase.
- Select the "Edit" menu
from the Menu Bar or press "Alt+E".
- Select the "Properties" option
from the drop down menu or press "R".
- Alternatively, you
can press "Enter" directly from the main screen.
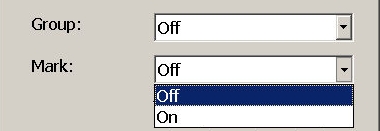
- The phrase properties
dialogue will appear.
- Tab around to the "Mark" element
and use the "Up" or "Down" Arrows
to set the item to "On".
- Press "Enter" to
confirm or "Escape" to cancel.
10.9.2 Inserting a mark directly
10.9.3 Removing a mark
To remove the mark coding from a phrase, do the following:
10.9.4 Deleting all marks from the project
If you wish to delete all the marks from the project in one operation, do
the following:
- Select the "Edit" menu from the Menu Bar or press "Alt+E".
- Select the "Delete
all marks" option from the drop down menu or press "K".
- A confirmation dialogue
box will appear. Press "Enter" to confirm
or "Escape" to cancel.
- If confirmed, all mark
codes will be deleted from the entire project.
10.10 Setting page, group or mark codes whilst recording
If you wish to insert the
page, group or mark codes whilst you are recording, simply press "P", "G" or "M" respectively
at the appropriate place in the recording.
Note: This method is recommended for advanced users only.
10.11 Comments
In order that the producer of the DAISY project can make notes for a section or phrase, this software provides the "Comment" element in the section or phrase properties dialogue box.
This may be used to store information about a section or phrase that will be referred to later or further guide the editing of it.
The comment text can also be used as an additional way of navigating the project before it is finished. Comment information does not affect the final DAISY book in any way.
10.11.1 Adding a comment to a section's properties
To add or edit a comment for a section, do the following:
- Select the section that is to have a comment added or edited.
- Select the "Edit" menu
from the Menu Bar or press "Alt+E".
- Select the "Properties" option
from the drop down menu or press "R".
- Alternatively, you
can press "Enter" directly from the main screen.
- Press "Tab" until
you are at the "Comment" element.
- Type in the required
comment text and press the "Enter" key.
- The comment will now
be added to the section properties.
10.11.2 Deleting a comment from the section properties
To delete a comment from a section properties, do the following:
- Select the appropriate section.
- Select the "Edit" menu
from the Menu Bar or press "Alt+E".
- Select the "Properties" option
from the drop down menu or press "R".
- Alternatively, you
can press "Enter" directly from the main screen.
- The section properties
dialogue box will appear.
- Tab round the dialogue
box to the "Comment" element.
- Press the "Delete" key
to remove all text in this edit box.
- Press the "Enter" key
to confirm the action or "Escape" to
cancel.
10.11.3 Deleting all comments from the project
If you wish to delete all comments from the entire project, do the following:
- Select the "Edit" menu from the Menu Bar or press "Alt+E".
- Select the "Delete all comments" option from the drop down menu or
press "N".
- A confirmation dialogue
box will appear. Press "Enter" to confirm
the action or "Escape" to cancel.
- If confirmed, all comments
will be removed from the project.
10.12 Exercises in editing a project
This chapter has covered most of the basic editing commands of the PRS
software. If you would like to practice some of these skills, Exercise
5 in Appendix A gives you this opportunity.
Return to Chapter
10 of ToC
Return to ToC
11 Creating and Editing the Table of Contents
The Table of Contents is
a collation of the information held in the "Section
Properties" dialogue boxes. This information can be created or edited
before or after making the recording. The method selected will depend on the
way the recording is made. For example, if you are creating a DAISY version
of a printed book, you may choose to set up the Table of Contents first and
then record the audio directly into your project. If you wish to make a recording
on location somewhere and then create a DAISY book with this audio, you would
tend to make the recording first, import the audio into your new project and
then edit the structure and the Table of Contents.
In the previous chapter
you learned how to edit the heading, level and comment information in the "Section Properties" dialogue box. This chapter
describes how to create the appropriate files for use with the "ToC Import" feature.
It also details how to run the import when the file has been created.
The "ToC Import" feature
of the PRS software allows for the import of 3 file formats. The information
that can be imported
will depend
on the file format chosen. Each format is discussed in detail below.
11.1 ToC (Table of Contents)
The format for a ToC file
to be used in the import process is HTML. Relevant files will have a ".HTML" or ".HTM" file
extension. Within the file there will be a list of the headings, each of
which has been marked
up for the appropriate heading level. For example, the HTML code for a simple
Table of Contents might look like the following:
<html>
<head></head>
<body>
<h1>Chapter 1</h1>
<h2>Section 1.1</h2>
<h2>Section 1.2</h2>
<h3>Sub Section 1.2.1</h3>
<h3>Sub Section 1.2.2</h3>
<h1>End of Book</h1>
</body>
</html>
If viewed in a web browser,
this would simply look like a list of headings of the correct level. In order
to create this file, you can use
an HTML editing
software, manually code the information into a text editor or you can type
the text in a word processor and save the file in HTML format. Either way the
file should be saved with a "HTML" or "HTM" file extension.
In addition, if you specify
an existing "NCC.HTML" or "NCC.HTM" file
as the source file for the import, any book information which is stored in
the meta data of the file, will be imported along with the heading and level
information.
Note: If you use a word
processor, ensure that each heading is on a separate line and that the appropriate
style is selected. For example,
If a heading
is to be Level 1 in the DAISY project, you should use the style "Heading
1" and so on.
11.2 CSV (Comma Separated Variables)
The CSV format allows you to import level, heading and comment information
directly into the section properties. You do not have to specify a comment
for each section - if no comment is appropriate, simply leave this entry blank.
The level and heading information, however, must be included.
One way to create the source
file in CSV format would be to use a spread sheet package and then "Save as" "CSV" format.
To ensure the correct result after the ToC Import, please note that the first
column used
should contain the level information and the second column should have the
heading text. Once saved in CSV format, the equivalent file for the example
above would look like:
1, Chapter 1,
Appropriate comment if required
2, Section 1.1, Appropriate comment if required
2, Section 1.2, Appropriate comment if required
3, Sub Section 1.2.1, Appropriate comment if required
3, Sub Section 1.2.2, Appropriate comment if required
1, End of Book, Appropriate comment if required
You could also create the
appropriate file for CSV import using a text editor and type the information
as above with the information for
each section on
a new line. Once typed, save the file as a text file ensuring that you give
the file a ".CSV" file extension.
11.3 TXT (Text)
This format is the least flexible import format and will only allow the heading
information to be imported. Level information cannot be imported using this
format.
In order to prepare a text
file for use with the "ToC Import" feature,
type your heading information on separate lines in a text editor and save the
file with an appropriate name and with a ".TXT" file extension. The
text file for the example project above would look like:
Chapter 1
Section 1.1
Section 1.2
Sub Section 1.2.1
Sub Section 1.2.2
End of Book
11.4 Running the "ToC Import" process
Having prepared the necessary file, you can import the information, either
before or after making the recording, as follows:
11.4.1 Importing the Table of Contents before recording
In order to run the "ToC Import" feature
before recording, do the following:
- Select the "Tool" menu from the Menu Bar or press "Alt+T".
- Select the "ToC
Import" item from the drop down list or press "O".
- You will then be prompted
to confirm that you wish to overwrite the existing Table of Contents (this
dialogue appears even when the project is empty).
Press "Enter" to
confirm or "Escape" to cancel.

- You will then be asked
to specify the file to be imported. Either type the folder and name of
the file or press "Tab" to select the "Select
File" button.
- If you choose to select
the file, a typical file open dialogue will be displayed. Select the type
of file to be ToC (*.HTML), CSV or
TXT as
appropriate and use
the "Look in" and file list elements to locate the correct
file. Press "Enter" when you have selected this file.
- Press "Enter" again
and the file selection will be finished.
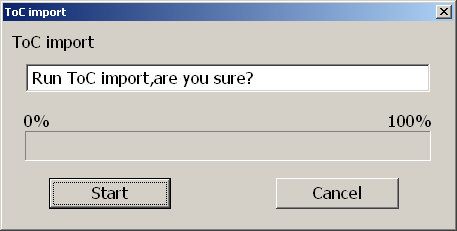
- A dialogue will appear
which asks you to confirm the ToC Import process. Press "Enter" and
the import will begin or "Escape" if you wish to
abandon the process.
- When the import is
complete, a final dialogue confirming that the import has been completed
will appear. Press "Enter to acknowledge this message.
11.4.2 Importing the Table of Contents into an existing project
This procedure is exactly the same as in the previous section except that
more care has to be taken. When the recording already exists, you should ensure
the following before importing a Table of Contents:
11.5 Exercises
in working with Tables of Contents (ToC)
Exercise
6 in Appendix A gives you a chance to try working with a variety of ToC formats and the "ToC Import" feature.
Return to Chapter
11 of ToC
Return to ToC
12 Building the book
Having completed all the
recording and editing of the project, there is one final process which must
be carried out before CD writing. This
is called "Building
the Book". This chapter details how to run the "Build Book" process
and the changes that this makes to the PRS project.
"Build Book" process
has two purposes, one is make project as DAISY2.02 compliant book, and the
other one is clean up audio files. Clean up process deleting
unnecessary part of audio files, and justifying one audio file corresponding
to one smile file.
12.1 How to run the "Build Book" process
To run the "Build Book" process,
do the following:
- Select the "Tool" menu from the Menu Bar or press "Alt+T".
- Select the "Build
Book" option from the drop down menu or press "B".
- Alternatively, you
can press "Control+B" directly from the main screen.
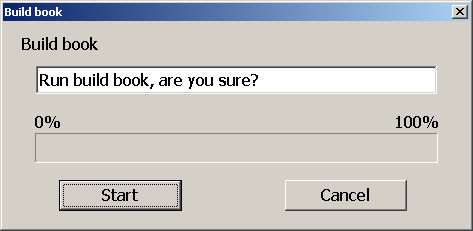
- A confirmation dialogue
box will appear.
- To continue with the
process, press "Enter" or press "Escape" to
cancel.
- If you choose to continue,
the build book process will start. This may take a while for larger projects.
- On completion, a dialogue
box will appear. Press "Enter" to acknowledge
that the process is complete.
Once this process has been finished, the book is ready to write to CD.
Note 1: Pressing the "F12" or "F9" keys during the "Build
Book" process will cause the Voice Guidance to announce the percentage
complete.
Note 2:
Before running the Build Book process, you should ensure that the "Book
Information" has been completed.
12.2 Outline of the alterations
involved in the "Build Book" process
During the "Build Book" process,
the PRS software makes a number of alterations to the files that you
will find in the project
folder. The main
alterations are as follows:
- The creation of a "NCC.HTML" file as the main navigation control
file for the finished DAISY book. This is created in addition to the "NCC.IMDN" intermediate
NCC file which has been in use up to this point.
- The creation of the
smile (.SMIL) files to link the navigation and audio files correctly.
- The completion of the "Date" and "Identifier" entries
in the Book Information.
- Deletion of any unnecessary
audio files in a clean up process.
Note 1:
Only PCM format audio files will be cleaned up during the "Build Book" process.
To clean
up MP3 audio files it requires the "Audio Export" function.
Note
2: The "Build Book" process
can also be used when the project needs to be cleaned up during the editing
stage.
Return to Chapter
12 of ToC
Return to ToC
13 Creating the CD
The process of creating
the new DAISY book is complete but the information must now be saved to CD.
You can either choose to save the
book as a "Master" copy
or as a "Distribution" copy. The master CD will contain all the files
which have been used in creating the project whereas the distribution CD will
only have the finished audio files, the relevant ".HTML" files and
the ".SMIL" files.
This Chapter explains how to create the final CD and how the CD writing options
affect the way in which the CD can be used afterwards.
In order to run the CD writing process, there are 2 stages as follows:
13.1 Configuring PRS for your CD writer
If you have not already done so when you first set up PRS , you need to
configure the software to know which CD writer you wish to use.
To configure the software to work with your desired CD writer, do the following:
- Select the "Option" menu from the Menu Bar or press "Alt+O".
- Select the "CDR
Drive" option from the drop down menu or press "D".
- Alternatively you can
press "Control+D" directly from the main screen.
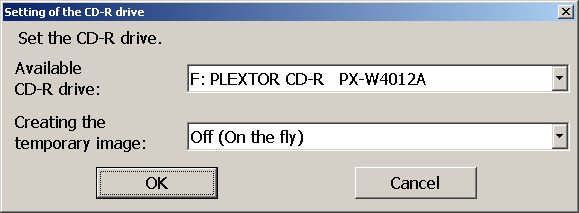
- This will take you
to the "Setting of the CDR Drive" dialogue box.
This dialogue has 2 elements, a list of available CDR/CDRW drives
and a radio button which allows you to turn on or off the facility for
creating a temporary
image file whilst recording.
- The focus will be on
the list of available drives. Use the "Up" or "Down" Arrow
keys to select your preferred drive.
- Press "Tab" to
move to the radio button for the temporary image setting. Use "Up" or "Down" Arrows
to set this feature to "On" or "Off".
- Press the "Enter" key
to confirm your selections.
Note 1: After confirming your selection, this will become the default selection
in the future. You can also change the selected drive or the temporary image
setting at any time.
Note
2: If you do not specify an appropriate CDR or CDRW drive, when you try to
write a CD, the error "Incorrect drive setting" will
appear.
Note 3: It is highly
recommended you use the CD-R/RW drive manufactured by
Plextor corp.
13.2 Writing the CD
To start the CD writing process, do the following:
- Ensure that the "Build Book" process
has been carried out before running CD writing.
- Select the "Tool" menu
from the Menu Bar or press "Alt+T".
- Select the "CD
Write" option from the drop down menu or press "W".
- Alternatively, you
can press "Control+W" directly from the main
screen.
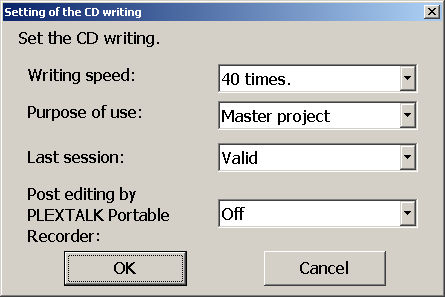
- The CD writing dialogue
box will appear. This contains 4 radio buttons which are: Writing speed,
Purpose of use, Select last
session and
Post editing by
the PLEXTALK portable recorder. Further details on each of these
is given below.
- Press the "Tab" key
to move around the dialogue box and use the "Up" or "Down" Arrows
to select the options you require.
- Finally press the "Enter" key
to confirm the settings.
- A confirmation dialogue
box will appear. Press "Enter" again to start
the CD writing or "Escape" to cancel.
Note1:
During CD writing the Voice Guidance will regularly say "Running" to
confirm that work is still being done. Press the "F12" or "F9" keys
to cause the Voice Guidance to speak the percentage complete.
Note2: Do not use another CD writing application to write
to a CD written by PRS. In some cases, the PRS material will become unreadable.
13.3 Explanation
of the CD writing dialogue box
The four main elements in the CD writing dialogue box are detailed below with
their functions:
13.3.1 Select writing speed
The range of options offered
in this box will depend on the selected CD writer. Use the "Up" and "Down" Arrow
keys to make your selection.
13.3.2 Purpose of use
This can be set to "Master Project" or "Distribution Copy".
For the master copy, all the project files, including the intermediate files,
will be saved onto the CD. The distribution copy CD will only contain the basic
set of files required to play the DAISY book. A master project CD will be able
to be opened directly by the PRS software. In order to edit a distribution
copy CD book, the DAISY Import function would need to be used.
13.3.3 Select last session
This option allows you
to select between "Valid" or "Invalid".
The "Last session" referred to is the previous CD writing session
or sessions on the CD you intend to write to. If this option is set to "Valid" you
will be able to view all previous sessions and the current session when
viewed on a computer. You will also be able to access all previously written
sessions
on the Plextalk PTR1/PTR2 and on other DAISY players. If you select "Invalid" you
will only be able to see the most recent session on a computer or any other
player. Essentially, by setting this option to "Valid" you will
be able to create multiple book CDs whereas the "Invalid" option
will leave only the current book 'visible' on the CD. The "Discinfo.html" file
will be adjusted by the software to suit your selection.
Note: When you select "Valid" to
create a multiple book CD, the books will be automatically listed alphabetically.
13.3.4 Post editing by Plextalk
portable recorder
This can be set to "On" or "Off".
If set to "On",
the book will be able to be edited after running the preparation for editing
process on the Plextalk PTR1/PTR2. If set to "Off", no further
editing will be possible on the Plextalk PTR1/PTR2.
Exercises in finishing the project and writing a CD.
Before looking at any of the more advanced features, you may wish to try completing
the process of creating your own DAISY book CD. Exercise 7 in
Appendix A sets
this challenge.
Return to Chapter
13 of ToC
Return to ToC
14 Additional Features of PRS
The PRS software contains a number of additional functions which enhance
the way in which you can work with DAISY projects. This chapter details the
features that have not been covered earlier in this manual.
14.1 DAISY
import
On occasion you may wish
to work on a DAISY book that you prepared earlier or that has been supplied
to you by someone else. You may want to
edit the
content, modify the structure or update the DAISY content from DAISY2.0 to
DAISY2.02 format. You may also wish to combine a number of DAISY books into
a single book. The first part of the process, for any of these situations,
is to know how to import the original book. The "DAISY Import" feature
allows you to do this in a simple way.
To import an existing DAISY book into an existing or new PRS project,
do the following:
- Create a new project file or open the project into which you wish to import
the DAISY book.
- Select the "Tool" menu
from the Menu Bar or press "Alt+T".
- Select the "DAISY
Import" option on the drop down menu or press "D".
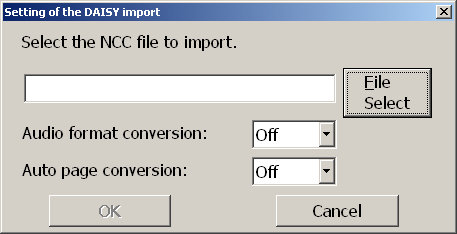
- A dialogue box will
appear where you can either type the location and name of the NCC file
of the book to be imported or press "Tab" to the "Select
File" button.
- If you choose to select
the file from a list, a standard file open dialogue box will appear. Use
this dialogue box to locate your
desired NCC file
and then press the "Open" button. You will return to
the previous dialogue box.
- Once you have selected
the correct file or have typed it in manually, the file name will appear
in the edit box.
- Press "Tab" to
move round the dialogue box to the next element which is the "Audio
Format Conversion" radio button. This can be set to "On" or "Off".
If set to "On", the imported audio files will be
converted to the same format as the parent project. If set
to "Off", no audio conversion
will take place.
- Press "Tab" again
and you will move to the "Auto Page Conversion" radio
button. Again this can be set to "On" or "Off".
If set to "On" automatic page codes and manual
page codes in the original book will be retained and/or converted
to automatic page codes. Front page
and special page codes will be ignored. If set to "Off",
all page codes will be discarded.
- Once you have set the
relevant options, press "Enter" to start the
DAISY import.
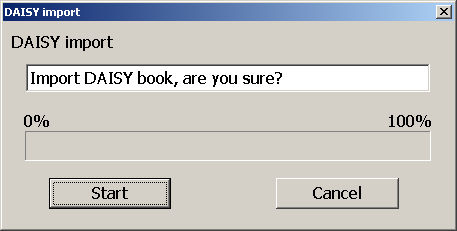
- A confirmation dialogue
box will appear. Press "Enter" to start the
import or "Escape" to cancel.
- When the import is
complete, a final confirmation dialogue box will appear. Press "Enter" to
acknowledge the completion of the process.
Note 1: The "DAISY Import" process
will retain all section and level information from the imported book(s).
When importing multiple
books, only
the book information from the first imported book will be retained.
Note
2: You can only import NCC files which have a ".HTML" or ".HTM" file
extension.
Note 3:
During the import process, pressing "F12" or "F9" will
cause the Voice Guidance to speak the percentage complete.
Note 4: Regardless of where you were in the project when you action the import
function, the imported book will be placed at the end of all existing sections.
Note 5: PRS can import books that are in the DAISY2.0 or DAISY2.02 format.
A full list of the audio formats which can be imported is given at Appendix
D, Table D3.
14.2 Audio Import
The PRS software enables you to easily import audio files for use in a
DAISY project. As the files are imported, the pause detection process is applied
in order to split the audio automatically into phrases. Once imported, the
audio can then be edited in the normal way.
In order to import an existing audio file into a PRS project, do the following:
- Select the position at which you want to insert the audio. If you select a
section on the Section List, the imported audio will be inserted at the beginning
of that section. If you select a phrase on the Phrase List, the imported audio
will be inserted into the section at that location. If you position the highlight
at the end of the Section List, the imported audio will be paced in a new section.
If you position the highlight at the end of the Phrase List, the imported audio
will be added at the end of that section.
- Select the "Tool" menu
from the Menu Bar or press "Alt+T".
- Select the "Audio
Import" option from the drop down menu or press "A".
- The "Recording
Function" dialogue box will appear. As discussed previously,
here you can specify a number of settings relating to the way the
audio will be interpreted on import. These include phrase pause time, section
pause time
and noise level settings.
- Make alterations to
these settings as appropriate and then press the "OK" button
or press "Enter".
- Depending on where
you positioned your highlight prior to the import, you may be asked to
confirm that you want to create a new section.
Press "Enter" to
confirm this or "Escape" to cancel.
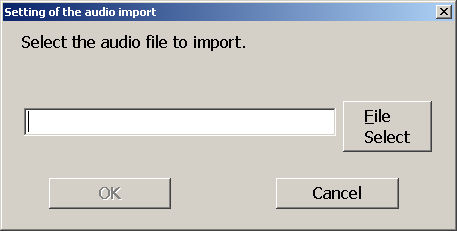
- If you choose to continue,
or if this dialogue box did not appear, a file selection dialogue box will
appear in which you will
be asked to
specify the file to
be imported. Either type this in directly or choose the "Select
File" button
to select the file from a standard file open dialogue box.
- Once you have selected
the required file for import, press "Enter" to
continue or "Escape" to cancel.
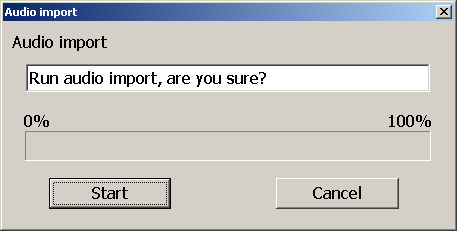
- A confirmation dialogue
box will appear, press "Enter" to start the
import process or "Escape" to cancel.
- When the import is
complete, a final confirmation dialogue box will appear. Press "Enter" to
acknowledge the completion of the process.
Note 1: It is possible to specify multiple files to import in the same import.
Just use the file list box to highlight the required files before running the
import. Files must be contiguous.
Note
2: Pressing the "F12" or "F9" key
during the import, will cause the Voice Guidance to speak the percentage
complete.
14.3 Audio Export
The "Audio Export" feature
allows you to convert the audio format of an existing DAISY project to an
audio format you specify.
This is done by
creating a new DAISY project which has your chosen audio format, whilst the
existing project remains unaffected.
"Audio Export" function
deleting unnecessary part of audio files including MP3 format.
To run the "Audio
Export" process, do the following:
14.4 Text Import
This feature enables you
to create a DAISY project from a source text file. The "Text Import" process
converts the text into synthesized speech which becomes the audio files for
the project.
To run the "Text Import" process,
do the following:
- Select the location in the project where you wish to insert the new audio
or create a new empty project.
- Select the "Tool" menu
from the Menu Bar or press "Alt+T".
- Select the "Text
Import" option from the drop down menu or press "T".
- The "Recording
Function" dialogue box will appear. Set the various
options to the required settings for the import and then press "Enter".

- You will then be asked
to select the text file to be imported. Either type this in the edit box
provided or select the "Select File" button
to be given a standard file open dialogue box where you can specify
the required file.
- After selecting the
file, press "Enter" to continue or "Escape" to
cancel.
- Another dialogue box
will appear which allows you to specify the voice, pitch, speed and volume
of the synthesized speech
to be
used in the
import process.
Use "Tab" to move around this dialogue and "Up" or "Down" Arrows
to alter the setting on each element. You can also use the "Page
Up" or "Page
Down" keys to make larger alterations.
- Once you have made
your selections, press the "OK" button or "Enter" key
to continue, or "Escape" to cancel.

- If you choose "OK",
a confirmation dialogue box will appear. Press "Enter" to
continue with the import or "Escape" to cancel.
- When the import is
complete, a confirmation dialogue box will appear. Press "Enter" to
acknowledge the completion of the process.
Note 1: Experimenting with the settings for pause detection and the speed
of the selected synthesizer, can result in the automatic phrase splitting being
very consistent throughout your new audio. For example, you should be able
to get the phrases to be created each time a new sentence or paragraph is detected.
This can save a lot of editing time.
Note 2: It is possible to specify multiple files to import in the same import.
Just use the file list box to highlight the required files before running the
import. Files must be contiguous.
Note
3: During the import process, the Voice Guidance will regularly say "Running".
If you wish to check the percentage progress, press "F12" or "F9".
Note
4: In the dialogue box where you specify the synthesizer properties, you can
use the "Default" button
to reset the settings back to the default settings for the selected voice.
14.5 Detecting the pause time
This is a simple feature
of the PRS software. It enables you to check what the pause time is for
phrases in your project. Sometimes
this is not displayed,
for example, after a "DAISY Import" no pause time will be displayed
in the phrase properties. Running the "Detecting the Pause Time" feature
will display the information.
To run the "Detecting the Pause Time" process,
do
the following:
14.6 Exercises
for the additional
features of PRS
This chapter has covered a number of the more advanced features of the PRS
software. If you wish to practice some of these, see Exercise
8 in Appendix A for some ideas.
Return to Chapter
14 of ToC
Return to ToC
APPENDICES
Appendix A - Sample Exercises
This appendix gives you a series of exercises to try out as you progress through
the PRS manual. Detailed instructions for each task are not given here
but, at times, some useful hints are given. If you feel you need more detailed
information, you can return to the chapter which relates to the exercise and
read the relevant sections again.
Copies of the exercises
are also available on the "PTR1/PTR2 User's Guide" CD
in the folder called "PRS\Sample Projects\Documents".
It is hoped that you will find the exercises to be a useful addition to the
manual and that they help you to reinforce your understanding and enjoyment
of the product as you learn.
Exercise 1 - Configuring PRS
This exercise will give you practice at configuring the PRS software including
the Voice Guidance, the display settings, Default folder for recording and
selecting a CDR or CDRW drive.
a. First of all you need
to launch your PRS software. Go ahead and do this now. Remember that
you can either use the "Plextalk Recording Software" icon
on the Desktop or by selecting it from the Windows Start Menu
When you get to the
first dialogue box, select "New" from the list and then press "Enter" to
accept the suggested recording format. At the next dialogue, just enter
a simple folder name and press "Enter". Press "enter" again
to accept the creation of the temporary folder. One final press of the "Enter" key
will allow you to bypass the book information for now, leaving you in a
new empty project.
b.
Once in the software, try turning off and on the Voice Guidance feature.
(Hint: "Voice Guidance" on the "Option" menu). Double
check that you have succeeded by trying to navigate the menu system or
main screen. If you have turned off the Voice Guidance, also note that
the "F12" and "F9" keys have no effect.
c.
Before trying the next task, you will have to make sure that you have turned
on the Voice Guidance following the previous one. Set the voice to be "Mary" with
a pitch of 200, speed of 150 and volume of 100. (Hint: try selecting the "Selection
of the TTS engine" option on the "Option" menu). Once you
have successfully managed to alter these settings, reset the voice back
to its original settings by using the "Default" button.
Finally, go back to
the same dialogue box and select a voice that you wish to keep as your
default voice. Set the pitch, speed and volume to suit your preferences
and save the settings.
d.
Now try adjusting the list and message fonts. Have a go at changing both
of these settings. (Hint: Try the "Option" menu and look for "List
font size" and "Message font size"). Try setting these to
the largest and smallest option offered and see how this affects the on
screen information.
e.
The next task is to set up a default folder for all your PRS projects.
By using the "Select folder" button in the "Recording Function" dialogue
box, now go ahead and try to set up a completely new folder in your "My
Documents" folder which is called "PRSProjects". (Hint:
You can access the "Recording Function" dialogue box from the "Recording" option
on the "Option" menu. Remember to select the parent folder and
then press the "Add New Folder" button before typing in the new
folder name).
f.
The last task in Exercise 1 is to select a valid CDR or CDRW drive for
writing to later on. Go ahead now and try to set up your preferred drive
as the default drive for the PRS software. (Hint: Try selecting the "CDR
Drive" option from the "Option" menu).
If you had difficulty
with any of the tasks, try reading Chapter 6 again.
Exercise 2 - Opening projects
and CD books
This exercise aims to
give you practice in opening existing projects or books and creating new
blank
projects. Before starting this exercise,
place the "PTR1/PTR2 User's Guide" CD in your CD drive.
On the CD there
is a folder called "PRS\Sample Projects\Samples" which contains
5 versions of the same project in different stages of production. The folders
are called "AfterBuild", "BeforeBuild", "DistributionCD", "MasterCD" and "Synthesized".
Before starting this exercise, you may find it useful to browse this folder
and familiarise yourself with the files in the various locations. You will
probably note that many of the folders have similar files but there are important
differences. These will be highlighted during this exercise.
a. Opening an existing
project. Try to open the project in the "Samples\BeforeBuild" folder.
You can either do this as you launch the PRS software by choosing "Open" from
the initial dialogue box or by using "Open" from the "File" menu.
(Hint: You are looking for a file called "NCC.IMDN" because you are
looking for a project file not a finished book file).
You can confirm that you
have successfully opened the project by pressing the "Left Arrow" key. You should hear the words "Bogmoor Amateur
Athletics Club" spoken.
b. Creating a new project.
Having successfully opened the existing project, you now decide to create
a new project altogether. Without exiting
from the
PRS software, try to create a new project and call it "TestProject1".
Remember that, if you have created a default folder earlier, your new project
will be saved into this folder unless you specify a different location. (Hint:
Select "New" from the "File" menu or press "Control+N").
Set the audio format to
be "MP3 64 kbps Mono" and complete the "Book
Information" with fictional information of your choice. Leave the "Identifier" element
empty for now.
Now exit the PRS software and re-launch it. At the opening dialogue box,
select to open a project and select the project that you just created. You
should see that this project has been selected automatically. PRS always
assumes that you want to continue working on the last used project.
c. Opening a finished book
from CD. If you feel happy opening existing projects, try opening a finished
DAISY book from CD. This is very
similar to opening
an existing project except that you have to locate a file called "NCC.HTML" or "NCC.HTM".
You will also be required to specify a new project name because the only way
to edit an existing DAISY book is to copy the information onto the hard drive
and create a new project. Information on a finalised CDR cannot be modified.
Try to open the finished
book which is located in the "PRS\Sample Projects\Samples\DistributionCD\AfterBuild" folder
on your sample CD. When prompted to give this a new project name, give
it the name "TestProject2". Remember to set the "Files
of Type" setting
in the "Open" dialogue box to the correct type of file).
If you had difficulty with any of the tasks, try reading Chapter
7 again.
Exercise 3 - Playing and navigating
in projects
This exercise is all about
navigating around a PRS project. First of all, open the project called "TestProject2" which
you created in the previous exercise. This should be located in your default
folder. Once you have opened
this project, try the following tasks:
a. Try switching from
the Section List to the Phrase List. Examine how the Phrase List changes
according
to which section is highlighted.
(Hint: Try using
the "Tab" key).
b. Use your arrow keys
to navigate up and down on the Section List and the Phrase List, listening
to what is spoken as you move. Try to
locate the section
that begins with the words "4.1 Competitions". Count how many phrases
are in this section of the project (the answer should be 8).
c. Try moving to the start
of the project and start listening to the project in continuous play mode.
Periodically stop the playback and
then re-start it.
(Hint: "F5" to start and "Spacebar" to stop).
d. Adjust the playback
speed and volume using the relevant function keys. (Hint: "F3" for volume and "F6" for speed. Remember that "Shift" with
these keys reduces the volume or speed).
e. Use the heading search
facility to find the heading containing the word "Competent".
This should take you to the "Any Other Competent Business" section.
Remember to press "Escape" to exit from the search facility after
finding the section.
f. This project has been
coded with page, group and mark codes. Use the relevant navigation keys to
move around the document to find these
codes. Try to find
out how many pages are in this project. The group code has been used to indicate
the items on the Treasurer's summary of the income and expenditure. Use the
group codes to find how much money is still due in membership fees. How many
marks has the producer of the project left in this title? (Hint: If you can't
remember the keyboard commands for these navigation items, look on the "Move" drop
down menu).
You should find 3 page
codes and the outstanding membership fees come to 150 pounds. There are 4
marks coded into this project.
Also note that the phrase which mentioned the outstanding membership fees
is coded with both the page and group codes.
g. Try using the event jump command to navigate backwards and forwards through
the project. Remember that an event can be any of the following: the first
phrase in a section, a phrase marked with a page code and a page marked with
a group code. Phrases coded with the mark code do not count as events.
If you had difficulty with any of the tasks, try reading Chapter
8 again.
Exercise 4 - Recording
In this exercise you will try out some of the basic recording features to
create your own first project. However, before you start recording, there are
a few checks to carry out.
a. Ensure that you have connected a microphone to the correct socket on your
sound card. Also check that the Windows Volume Controls are set correctly for
accepting audio input from the microphone. If you are not sure of how to do
this, you should seek help from the Windows Help system.
b. Open the project you
created earlier called "TestProject1".
This should still be an empty project with no recorded audio.
c. Now set PRS to accept
input from the microphone. (Hint: Try the "Selection
of the Recording Volume Control" option on the "Control" menu).
This should be set to "Microphone".
d. Before recording it
is usually sensible to check out the available resources. Check what available
resources you currently have on
your system. (Hint: Use
the "Storage Information" option on the "Tool" menu). Remember
to OK the dialogue box when you have reviewed the data.
e. Now
set up the "Recording
Function" dialogue box with the following
settings: Phrase pause time=0.3 seconds, Noise level=Normal, Section pause
time=Nothing, Create a new audio file=Yes, Time to stop recording=Nothing,
Record speed=Normal
speed and Remove DC Offset=Off . (Hint: Use
the "Recording" option on the "Option" drop down menu).
f. Set your PRS software
to be in "Overwrite" mode. (Hint:
Try using the "F7" key).
g. Ensure that your microphone
is turned on and set the software into "Test
Recording" mode. Check that your recording level is in an acceptable range
and then start recording. (Hint: Use "F8" to start the process and "F4" key
to adjust the recording volume). Try to record about 3 or 4 minutes of audio.
You may wish to read from a document or book. As you record new audio, you
should see the phrase splitting working. This will be clear from the lower
section of the main screen as the Phrase List starts to grow. When you have
recorded a reasonable section of audio, stop recording (Hint: Use "Spacebar").
h. Check through your new project and observe how the phrase detection process
has worked. If the phrases are very short, you probably need to increase the
phrase pause time. If the phrases are very long, you may need to reduce it.
i. Make any adjustments
that you think might be necessary to the pause time in the "Recording Function" dialogue box. Move your highlight to
a phrase somewhere in the middle of your recording. Choose a new piece of text
to record and select "Punch in" recording mode. Press "F8" to
bring up the Punch in dialogue box. Leave this set to "Nothing" and
press "Enter". You should now be in "Test Recording" mode
- adjust the recording level to suit. Press "F8" again to start recording
and read some of your new piece of text. Again the phrases in the new recording
should start to appear on the Phrase List. Stop recording after a minute or
two.
j. Try navigating through your project. You should observe that the new audio
has been entered into the middle of the original recording.
If you had difficulty with any of the tasks, try reading Chapter
9 again.
Exercise 5 - Editing projects
This exercise is to get you used to manipulating sections and phrases in a
PRS project. Remember that much of the editing is very similar to word
processing in terms of selecting and some of the basic commands like cut, copy,
paste and undo. Initially we will use the project that you created in Exercise
4 so do not worry about making mistakes, as the project is not important and
was created to be used for experimentation.
a. First, spend some time moving around the project and observe how the phrase
detection has worked. It is always useful to get an idea of how well this has
worked in a project because, particularly for short documents, it is sometimes
easier to re-record the project rather than spend a relatively long time editing
it. For the purposes of this exercise, we will assume that it has worked reasonably
well.
b. Try to select individual
phrases and use the cut, copy and paste commands to move phrases around the
project or delete them entirely.
Try repeating these
commands for multiple phrases. (Hint: Select multiple phrases by holding down "Shift" whilst
pressing "Up" or "Down" Arrow keys).
c. Work your way through
the Phrase List and create new sections at parts of the recording where you
think it might be appropriate to have
a new section
start. This might be the start of a new paragraph or heading in the original
document. If you do not think that there are any obvious splitting positions,
just choose some phrases and create a new section at that location. (Hint:
Use the "Control+Q" command and remember that you cannot create a
new section if you are on the first phrase in the current section). Try to
create around 5 sections in your project.
d. Now use the cut, copy and paste commands on the newly created sections.
Observe how similar this process is to working with phrases.
e. Having made a few edits,
try undoing some of these. (Hint: Use "Control+Z" and
remember you can undo the last 10 edits).
f. Select a number of phrases
or sections and try to join them together. (Hint: Use "Control+J" in
both cases). Check that the sections or phrases have joined correctly by
playing them.
g. Try to find a phrase
which appears to be longer than you would like. Split this phrase into 2
phrases at a sensible location. (Hint:
Use "Control+P" followed
by your "Left" and "Right" Arrow keys). Try to observe
how the position in the phrase can be moved backwards or forwards through the
phrase and how the phrase will play from that point onwards. Remember to press "Enter" when
you think you have selected the correct location for the split.
h. Insert a new blank section
into the Section List at a position of your choice. (Hint: Use "Shift+Insert"). Record some new audio into this
section using "Overwrite" mode.
i. For the next part of
this exercise, re-load the "TestProject2" project
that you saved earlier. On the Section List, select the section called "3.
Reports from the Committee". Press "Enter" to view the section
properties dialogue box. Tab around this box to see what the level and heading
text is for this section. In this case, you should see that the level is Level
2 and the heading text is "Reports from the Committee". Move to the
next section by pressing "Alt+Right Arrow" and observe the same information
for this section. This time the level is Level 3 and the heading text is "President's
Report". Move to other sections and check the properties. Remember that
you can press "F12" or "F9" to hear the section properties
spoken by the Voice Guidance system.
j. Use
the page or group jump command to move to he phrase "Memberships
still due 150 pounds". Examine the phrase properties of this phrase. You
should observe that both the "Page" and "Group" options
are selected. Try unchecking these 2 check boxes and press "Enter".
Move to the top of the recording and try to navigate back to this phrase using
the page
or group jump commands. Neither of these should now work because the codings
have been removed.
k. To
reset these 2 codes, navigate to the "Treasurer's Report" on
the Section List and then switch to the Phrase List. Move down the list until
you find the phrase called "Memberships still due 150 pounds". Re-apply
the page and group codes by pressing "P" and "G" respectively.
You should now be able to use the page and group jump commands once again.
Also try pressing "F12" or "F9" to hear the Voice Guidance
read the properties for the phrase.
l. In order to demonstrate
the simplicity of removing all page and group codes from the entire project,
go ahead and do this now. (Hint:
Use the "Delete
all pages" and "Delete all groups" options from the "Edit" menu).
Verify that this has worked after carrying out both commands.
m. If you are happy that this worked properly, undo both of these commands
to return the page and group codes to the project.
n. Add comments to 3 sections of your choice. Do not worry about the relevance
of the comment text as long as it is recognisable. (Hint: Do this in the section
properties dialogue box for each section). Check that you have added the text
correctly by reviewing the section properties after entering the text.
o. Remove all the comment
text from the project using a single command. (Hint: Use the "Delete all comments" option from the "Edit" drop
down menu.
If you had difficulty with any of the tasks, try reading Chapter
10 again.
Exercise 6 - Working with Tables
of Contents
This exercise is to give
you the chance to see the advantages of importing a Table of Contents
into a PRS project rather than editing
the section
properties manually. A number of sample Tables of Contents have been supplied
in the folder called "PRS\Sample Projects\TablesOfContents" on
the "PTR1/PTR2
User's Guide" CD. The 3 files are all called "CommitteeMinutes" but
have different file name extensions according to the formats of the files.
a. Load
the project called "BeforeBuild" from
the "PTR1/PTR2
User's Guide" CD. Observe that this project has only the default
section properties for all sections. All sections are set to Level 1
and the heading
text for all sections is "Heading". This is not particularly
useful information. Editing a larger project manually would take some time.
b. Move
to the top of the project and highlight the first section. Now use the "ToC
Import" feature
to import the "CSV" format file
from the "PRS\Sample Projects\TablesOfContents" folder on the "PTR1/PTR2
User's Guide" CD.
(Hint: Use the "ToC
Import" option on the "Tool" menu). Observe the change in
the section property information and how quickly the import process worked.
c. Use Windows Explorer
to browse to the "TablesOfContents" folder
and examine the contents of the 3 different files. You should observe that
they all have the heading text information but the ".HTML" and ".CSV" format
files are able to store other information as well.
d. Create a brand new project
and call it "TestProject3". Do not
enter any book information when the dialogue box appears, simply press the "Enter" key
to bypass it at this time. Before any audio is included in the project, try
using the "ToC Import" feature to import the ".HTML" version
of the Table of Contents. You should observe that this process automatically
creates empty sections ready to record the audio into. In addition to creating
the required number of sections, the level and heading text information is
also created. At this stage you would then have to record and edit the audio
and modify the book information. Remember that, if the ".HTML" file
is an "NCC.HTML" file, some or all of the book information will have
been imported at the same time. Observe the book information that now exists
and you will see that the project title and most of the other book information
items have been entered automatically.
These short exercises will
have shown you the benefits of using the "ToC
Import" feature of the software. As mentioned in the manual, which method
used will depend on the circumstances of the project.
If you had difficulty with any of the tasks, try reading Chapter
11 again.
Exercise 7 - Building the book
and CD writing
This exercise will briefly look at the finishing of the book and writing the
project to CD. If you wish to do all these exercises, you will require to have
some blank CDR or CDRW disks available.
a. Use Windows Explorer
to examine the files in the project folder for the "TestProject2".
You should observe that there is no "NCC.HTML" file and probably
no smile (.SMIL) files.
b. Load the "TestProject2" project, and run the "Build Book" routine
from the "Tool" menu. Re-examine the project folder and several extra
files will have appeared. Essentially this means that the folder now contains
files that are required for the finished project and the files that were necessary
during the creation process.
c. Place
a blank disk in the drive you selected as your default drive in Exercise
1. You need to do
this before continuing with the CD writing
process. If a
CD is not found in the designated drive, an "Unknown error" error
message will appear. Select the "CD Write" option from the "Tool" drop
down menu. Use the dialogue box which appears to set the following: Writing
speed=4 times, Project purpose=Master project, Last session=Valid and Post
editing by PLEXTALK Portable Recorder=Off.
d. Having set the correct
values, press the "OK" button to accept
the CD writing options. When the writing process is complete, observe the files
that are on the disk. You should note 1 file and one folder. The folder should
contain all your normal project files, including both the temporary files and
the final book files. This is because the CD was set to be a Master Project
CD. This will allow future editing of the project by the PRS software.
The second item will be a file called "DISCINFO.HTML". This file
is used to give information to DAISY players about the structure of the books
in the folder. When there is more than one book, this file stores information
on all the books thus acting as a kind of catalogue file.
e. Before writing another
copy of the same project to the CD, use the Book Information dialogue to
change the title of the project. Perhaps
call it "Second
attempt" or something similar, but certainly different than the existing
title. e. Run the "Build Book" process again.
f. Now
call up the CD Write dialogue again and set the options as follows: Writing
speed=4 times, Project
purpose= Distribution CD, Last
session=Valid
and Post editing by PLEXTALK Portable Recorder=Off. Go ahead and run the
CD writing routine. By choosing to create a Distribution CD, the intention
is that
end users
do
not have access
to all the files that would be required to immediately edit the file with
the PRS software. It could still be edited but would have to be imported
using
the "DAISY Import" feature before this could happen. When the
CD writing is complete, again examine the contents of the newly created
folder
and the "DISCINFO.HTML" file. This time the project folder should
have no intermediate files as there were in the Master project folder.
The "DISCINFO.HTML" file
should now show a listing for the project with the old name and the new
name. The 2 books will be listed alphabetically so do not be too concerned
if the
second book is listed before the first one.
This exercise should have given you a chance to experiment with some of the
processes required to create your final CD.
If you had difficulty with
any of the tasks, try reading Chapter
12 and Chapter 13 again.
Exercise 8 - Some advanced features
For the more advanced features of the PRS software, detailed exercises
have not been supplied. However, some ideas of things to try are given below:
a. DAISY
Import - Try importing several copies of the finished books into a single
new project. Call this
project "TestProject4". Use the "DAISY
Import" feature to achieve this. Use either the "PRS\Sample Projects\Samples\DistributionCD" folder
or the "PRS\Sample Projects\Samples\MasterCD" folder for your source
books.
When setting up the project
initially, set the recording format to be MP3 32 kbps Mono. When running
the import, set the audio conversion
to be "On".
b. Audio Import - Try importing
a small quantity of audio files using the "Audio
Import" feature. Create a new project called "TestProject5" for
this purpose. You could also try importing more than one file at a time by
selecting multiple files prior to running the import.
c. Audio Export - Run the "Audio Export" process to change the recorded
format to a different one. You will be asked to specify a new folder name during
this process. Call the new project "TestProject6".
d. Text
Import - In the "PRS\Sample
Projects\Documents" folder on the "PTR1/PTR2 User's Guide" CD
there are a number of documents in ".TXT" format.
Try using one of these files to run the "Text Import" function
of the software. You may need to experiment with the settings for the "Pause
time" and the speed of the chosen TTS engine to try to get the phrase
detection working well. Because a synthesizer is very regimented in the way
it speaks, the results can be excellent. When prompted to do so, name the
new project "TestProject7".
On the "PTR1/PTR2
User's Guide" CD, in the
folder called "PRS\Sample Projects\Samples\Synthesized",
there is an example of a project which was created using the "Text
Import" feature.
Very little editing was required to this project so compare your results
with this one.
If you had difficulty with any of the tasks, try reading Chapter
14 again.
Appendix B - Menu Details
This appendix details all the items which appear on the PRS main menu
and sub menus. The information is displayed in a table with 3 columns. Column
1 lists the main menu item with its highlighted letter in parentheses. Column
2 lists the sub menu items and their highlighted letters in parentheses. Column
3 details the short cut keys (if one exists) for the associated sub menu item.
Main Menu
|
Sub Menu |
Short Cut Keys |
File (F)
|
New (N) |
Control + N |
| File (F) |
Open (O) |
Control + O |
| File (F) |
Exit (X) |
Alt + F4 |
| Edit (E) |
Undo (U) |
Control + Z |
| Edit (E) |
Cut (T) |
Control + X |
| Edit (E) |
Copy (C) |
Control + C |
| Edit (E) |
Paste (P) |
Control + V |
| Edit (E) |
Delete (D) |
Delete |
| Edit (E) |
All delete (E) |
None |
| Edit (E) |
All select (L) |
Control + A |
| Edit (E) |
Join (J) |
Control + M |
| Edit (E) |
Split section (O) |
Control + Q |
| Edit (E) |
Split phrase (H) |
Control + P |
| Edit (E) |
Insert section (I) |
Shift + Insert |
| Edit (E) |
Level up (V) |
F11 |
| Edit (E) |
Level down (W) |
Shift + F11 |
| Edit (E) |
Group (G) |
G |
| Edit (E) |
Page (A) |
P |
| Edit (E) |
Mark (M) |
M |
| Edit (E) |
Delete all pages (S) |
None |
| Edit (E) |
Delete all marks (K) |
None |
| Edit (E) |
Delete all comments (N) |
None |
| Edit (E) |
Property (R) |
Enter |
| Move (M) |
Move top (T) |
Home |
| Move (M) |
Move bottom (B) |
End |
| Move (M) |
Previous group (V) |
Shift + Left Arrow |
| Move (M) |
Next group (X) |
Shift + Right Arrow |
| Move (M) |
Previous page (P) |
Control + Up Arrow |
| Move (M) |
Next page (N) |
Control + Down Arrow |
| Move (M) |
Previous mark (R) |
Control + Left Arrow |
| Move (M) |
Next mark (E) |
Control + Right Arrow |
| Move (M) |
Previous event (I) |
Shift + F |
| Move (M) |
Next event (T) |
Shift + J |
| Move (M) |
Find heading (F) |
Control + F |
| Control (C) |
Play continuously (P) |
F5 |
| Control (C) |
Stop (S) |
Spacebar |
| Control (C) |
Record (R) |
F8 |
| Control (C) |
Record mode (M) |
F7 |
| Control (C) |
Selection of the recording
volume control (V)
|
None |
| Control (C) |
Line (L), Microphone (M) |
None |
| Control (C) |
Play volume mute of selected
rec. control (T) |
None |
| Control (C) |
Off (F), On (O) |
None |
| Control (C) |
Speed up (E) |
F6 |
| Control (C) |
Speed down (O) |
Shift + F6 |
| Control (C) |
Input volume up (U) |
F4 |
| Control (C) |
Input volume down (D) |
Shift + F4 |
| Control (C) |
Wave out volume up (W) |
F3 |
| Control (C) |
Wave out volume down (A) |
Shift + F3 |
| Control (C) |
Refresh (F) |
F10 or Control + L |
| Tool (T) |
Build book (B) |
Control + B |
| Tool (T) |
DAISY import (D) |
None |
| Tool (T) |
Audio import (A) |
None |
| Tool (T) |
Text import (T) |
None |
| Tool (T) |
ToC import (O) |
None |
| Tool (T) |
Audio export (E) |
None |
| Tool (T) |
Detecting the pause time (P) |
None |
| Tool (T) |
CD write (W) |
Control + W |
| Tool (T) |
Storage information (S) |
Control + S |
| Option (O) |
Book information (B) |
Control + I |
| Option (O) |
Recording (R) |
Control + R |
| Option (O) |
CD-R drive (D) |
Control + D |
| Option (O) |
Voice guidance (G) |
None |
| Option (O) |
Selection of the TTS engine
(S) |
None |
| Option (O) |
List font size (F) |
None |
| Option (O) |
Largest (G), Larger (L), Smaller
(S), Smallest (A) |
None |
| Option (O) |
Message font size (M) |
None |
| Option (O) |
Largest (G), Larger (L), Smaller
(S), Smallest (A)
|
None |
| Help (H)
|
About (A) |
F1 |
Appendix C - Short-cut Details
This appendix details the short cut keys available in the PRS software.
These are grouped in 4 tables. The tables relate to different processes as
follows:
Commands for Selecting
Phrases & Sections
Function
|
Shortcut Key |
| Select top position |
Home |
| Select last position |
End |
| Select previous |
Up Arrow |
| Select next |
Down Arrow |
| Page up the list |
Page UP |
| Page down the list |
Page Down |
| Select first phrase |
Shift + B |
| Select last phrase |
Shift + N |
| Select first section |
Shift + T |
| Select last section |
Shift + Y |
| Select previous phrase |
B |
| Select next phrase |
N |
| Select previous section |
T |
| Select next section |
Y |
| Select previous page |
Ctrl + Up Arrow |
| Select next page |
Ctrl + Down Arrow |
| Select previous group |
Shift + Left Arrow or Shift + G |
| Select next group |
Shift + Right Arrow or Shift
+ H |
| Select previous mark |
Ctrl + Left Arrow |
| Select next mark |
Ctrl + Right Arrow |
| Select previous event |
Shift + F |
| Select next event |
Shift + J |
| Select all list |
Ctrl + A |
| Select multi lists |
Shift + Up Arrow or Shift +
Down Arrow |
| Change list |
Tab |
Commands for Recording & Playback
| Function |
Shortcut Key |
| Play continuously |
F5 |
| Play selected phrase (focus
phrase list ) |
Left Arrow or Right Arrow |
| Play first phrase of selected
section (focus section list) |
Left Arrow or Right Arrow |
| Recording start |
F8 |
| Recording start (skip test
recording) |
Shift + F8 |
| Stop Recording/Playback |
Spacebar |
| Increase playback speed |
F6 |
| Decrease playback speed |
Shift + F6 |
| Change recording mode |
F7 |
| Increase input volume level |
F4 |
| Decrease input volume level |
Shift + F4 |
| Increase wave-out volume level |
F3 |
| Decrease wave-out volume level |
Shift + F3 |
| Create Section during recording |
Insert |
| Set/cancel group during recording |
G |
| Set/cancel auto page during
recording |
P |
| Set/cancel mark during recording |
M |
Commands for Editing
| Function
|
Shortcut Key |
| Section/Phrase property window |
Enter |
| Hierarchical level up |
F11 or L |
| Hierarchical level down |
Shift + F11 or O |
| Set/cancel group |
G |
| Set/cancel page |
P |
| Set/cancel mark |
M |
| Cut section/phrase |
Ctrl + X |
| Copy section/phrase |
Ctrl + C |
| Paste section/phrase |
Ctrl + V |
| Undo |
Ctrl + Z |
| Insert the section |
Shift + Insert |
| Delete the sections and phrases |
Delete |
| Delete phrase |
\ (back slash) |
| Delete section |
' (grave accent) |
| Join sections/phrases |
Ctrl + M or C |
| Split section |
Ctrl + Q or S |
| Split phrase |
Ctrl + P or H |
| Create new project |
Ctrl + N |
Open project
|
Ctrl + O |
Miscellaneous Commands
| Function |
Shortcut Key |
| Recording setting |
Ctrl + R or [ (open bracket) |
| Find heading |
Ctrl + F or Ctrl + E |
| Refresh |
Ctrl + L or F10 |
| Build book |
Ctrl + B |
| Setting of the CD-R drive |
Ctrl + D |
| CD writing |
Ctrl + W |
| Storage information |
Ctrl + S |
| Book information |
Ctrl + I |
| About version information |
F1 |
| Voice guidance for volume levels,
position of section/phrase, sound format |
Shift + F1 |
| Voice guidance for current
status |
F12 or F9 |
| Mute voice guidance |
Ctrl |
Appendix D - Technical Details
Table D1 - List of recommended CDR/CDRW drives
Whilst there are many CDR and CDRW
drives which will work with the PRS , SHINANOKENSHI recommends the following drives:\
PLEXTALK
Portable Recorder (PTR1 or PTR2) |
PX-W1210TA |
PX-W1610TA |
PX-W2410TA |
PX-W4012TA |
PX-W4824TA |
PX-5224TA |
PX-5232TA |
PX-320A |
PX-504A (*) |
PX-S88TU |
PX-208U |
PX-W2410TU |
PX-W4012TU |
PX-708A/UF (*) |
PX-712A (*) |
PX-716A
(*) |
*Note 1: You cannot write to DVD media on this drive, only to CDR or CDRW
media.
Note 2:
This list is correct as at July 2004.
Table D2 - List of sample rates and equivalent recording times
SOUND FORMAT
|
74 MINUTE MEDIA |
80 MINUTE MEDIA |
| PCM 44.1 kHz Stereo |
60 minutes |
65 minutes |
| PCM 44.1 kHz Mono |
120 minutes |
130 minutes |
| PCM 22.05 kHz Mono |
240 minutes |
260 minutes |
| MP3 256 kbps Stereo, Sampling
frequency: 44.1 kHz |
5 hours |
6 hours |
| MP3 128 kbps Stereo, Sampling
frequency: 44.1 kHz |
10 hours |
11 hours |
| MP3 64 kbps Mono, Sampling
frequency: 44.1 kHz |
20 hours |
22 hours |
| MP3 48 kbps Mono, Sampling
frequency: 22.05 kHz |
30 hours |
32 hours |
| MP3 32 kbps Mono, Sampling
frequency: 22.05 kHz |
40 hours |
45 hours |
| MP3 24 kbps Mono, Sampling
frequency: 16 kHz |
60 hours |
64 hours |
MP3 16 kbps Mono, Sampling
frequency: 16 kHz
|
80 hours |
90 hours |
Table D3 - Audio formats
which can be imported by the "DAISY Import" feature
| AUDIO FORMAT |
EXTENSION NAME |
DETAILS |
| MPEG1 Layer II |
mp2, mpg |
Bitrate: 32 kbps to 384 kbps
Channel: Mono/Stereo/Joint Stereo |
| MPEG1 Layer III |
mp3, wav |
Bitrate: 32 kbps to 320 kbps
Channel: Mono/Stereo/Joint Stereo |
| MPEG2 Layer II |
mp2, mpg |
Bitrate: 8 kbps to 160 kbps
Channel: Mono/Stereo/Joint Stereo |
| MPEG2 Layer III |
mp3, wav |
Bitrate: 8 kbps to 160 kbps
Channel: Mono/Stereo/Joint Stereo |
| DAISY ADPCM2 |
wav |
Quantifying bit number: 4 bits
Channel: Mono |
| PCM |
wav |
Quantifying bit number: 8 bits/16
bits
Channel: Mono/Stereo |
Return to Appendices
of ToC
Return to ToC
Return to Top Page